Fortifying Your Home
No matter how strong the survivor, everyone needs a place to call home. Fixing up your home and turning it into the ultimate apocalypse-survival base is an exciting and critical part of the game.
Clearing & Claiming Your Base

If you played through the tutorial, you’ll start off at Providence Ridge’s starter base right off the bat. If you skipped the tutorial, after choosing your difficulty, map and characters, you’ll start off next to a car that has no gas with your two other survivors, and you’ll have to find your way to the map’s starter base on foot. Don’t forget to check the car’s truck for goodies before you head out.
Once at the starter base, you’ll need to search every space and clear out any zombies before you can claim it. This is standard when moving into any base. Can’t find that last pesky Zed? Check the mini map: zombies are labeled by a yellow dot. You will always meet the requirements for this base, so after you’ve evicted the zombies, claim your reward at the supply locker, labeled with this symbol.


Supply Locker
The supply locker is where all of your community’s items will be stored. Weapons, ammo, fuel, medical supplies, and more. It is divided into 6 tabs: All Items, Ranged Weapons (including their ammo and attachments), Melee Weapons, Consumable Items (Medical supplies, energy boosters, fuel, car repair kits, explosives, etc.), Crafting Items (chemicals, seeds, parts, and facility mods), and Miscellaneous Items (backpacks and luxury items).
Each tab defaults to sort by “type,” you can change how it sorts your items by hitting LT on Xbox or C on the keyboard.
Scrolling over guns, ammo, or accessories will highlight what they are compatible with.
Note: you cannot access rucksacks in the supply locker, they can only be accessed at your base’s storage unit. For more on rucksacks see click here.
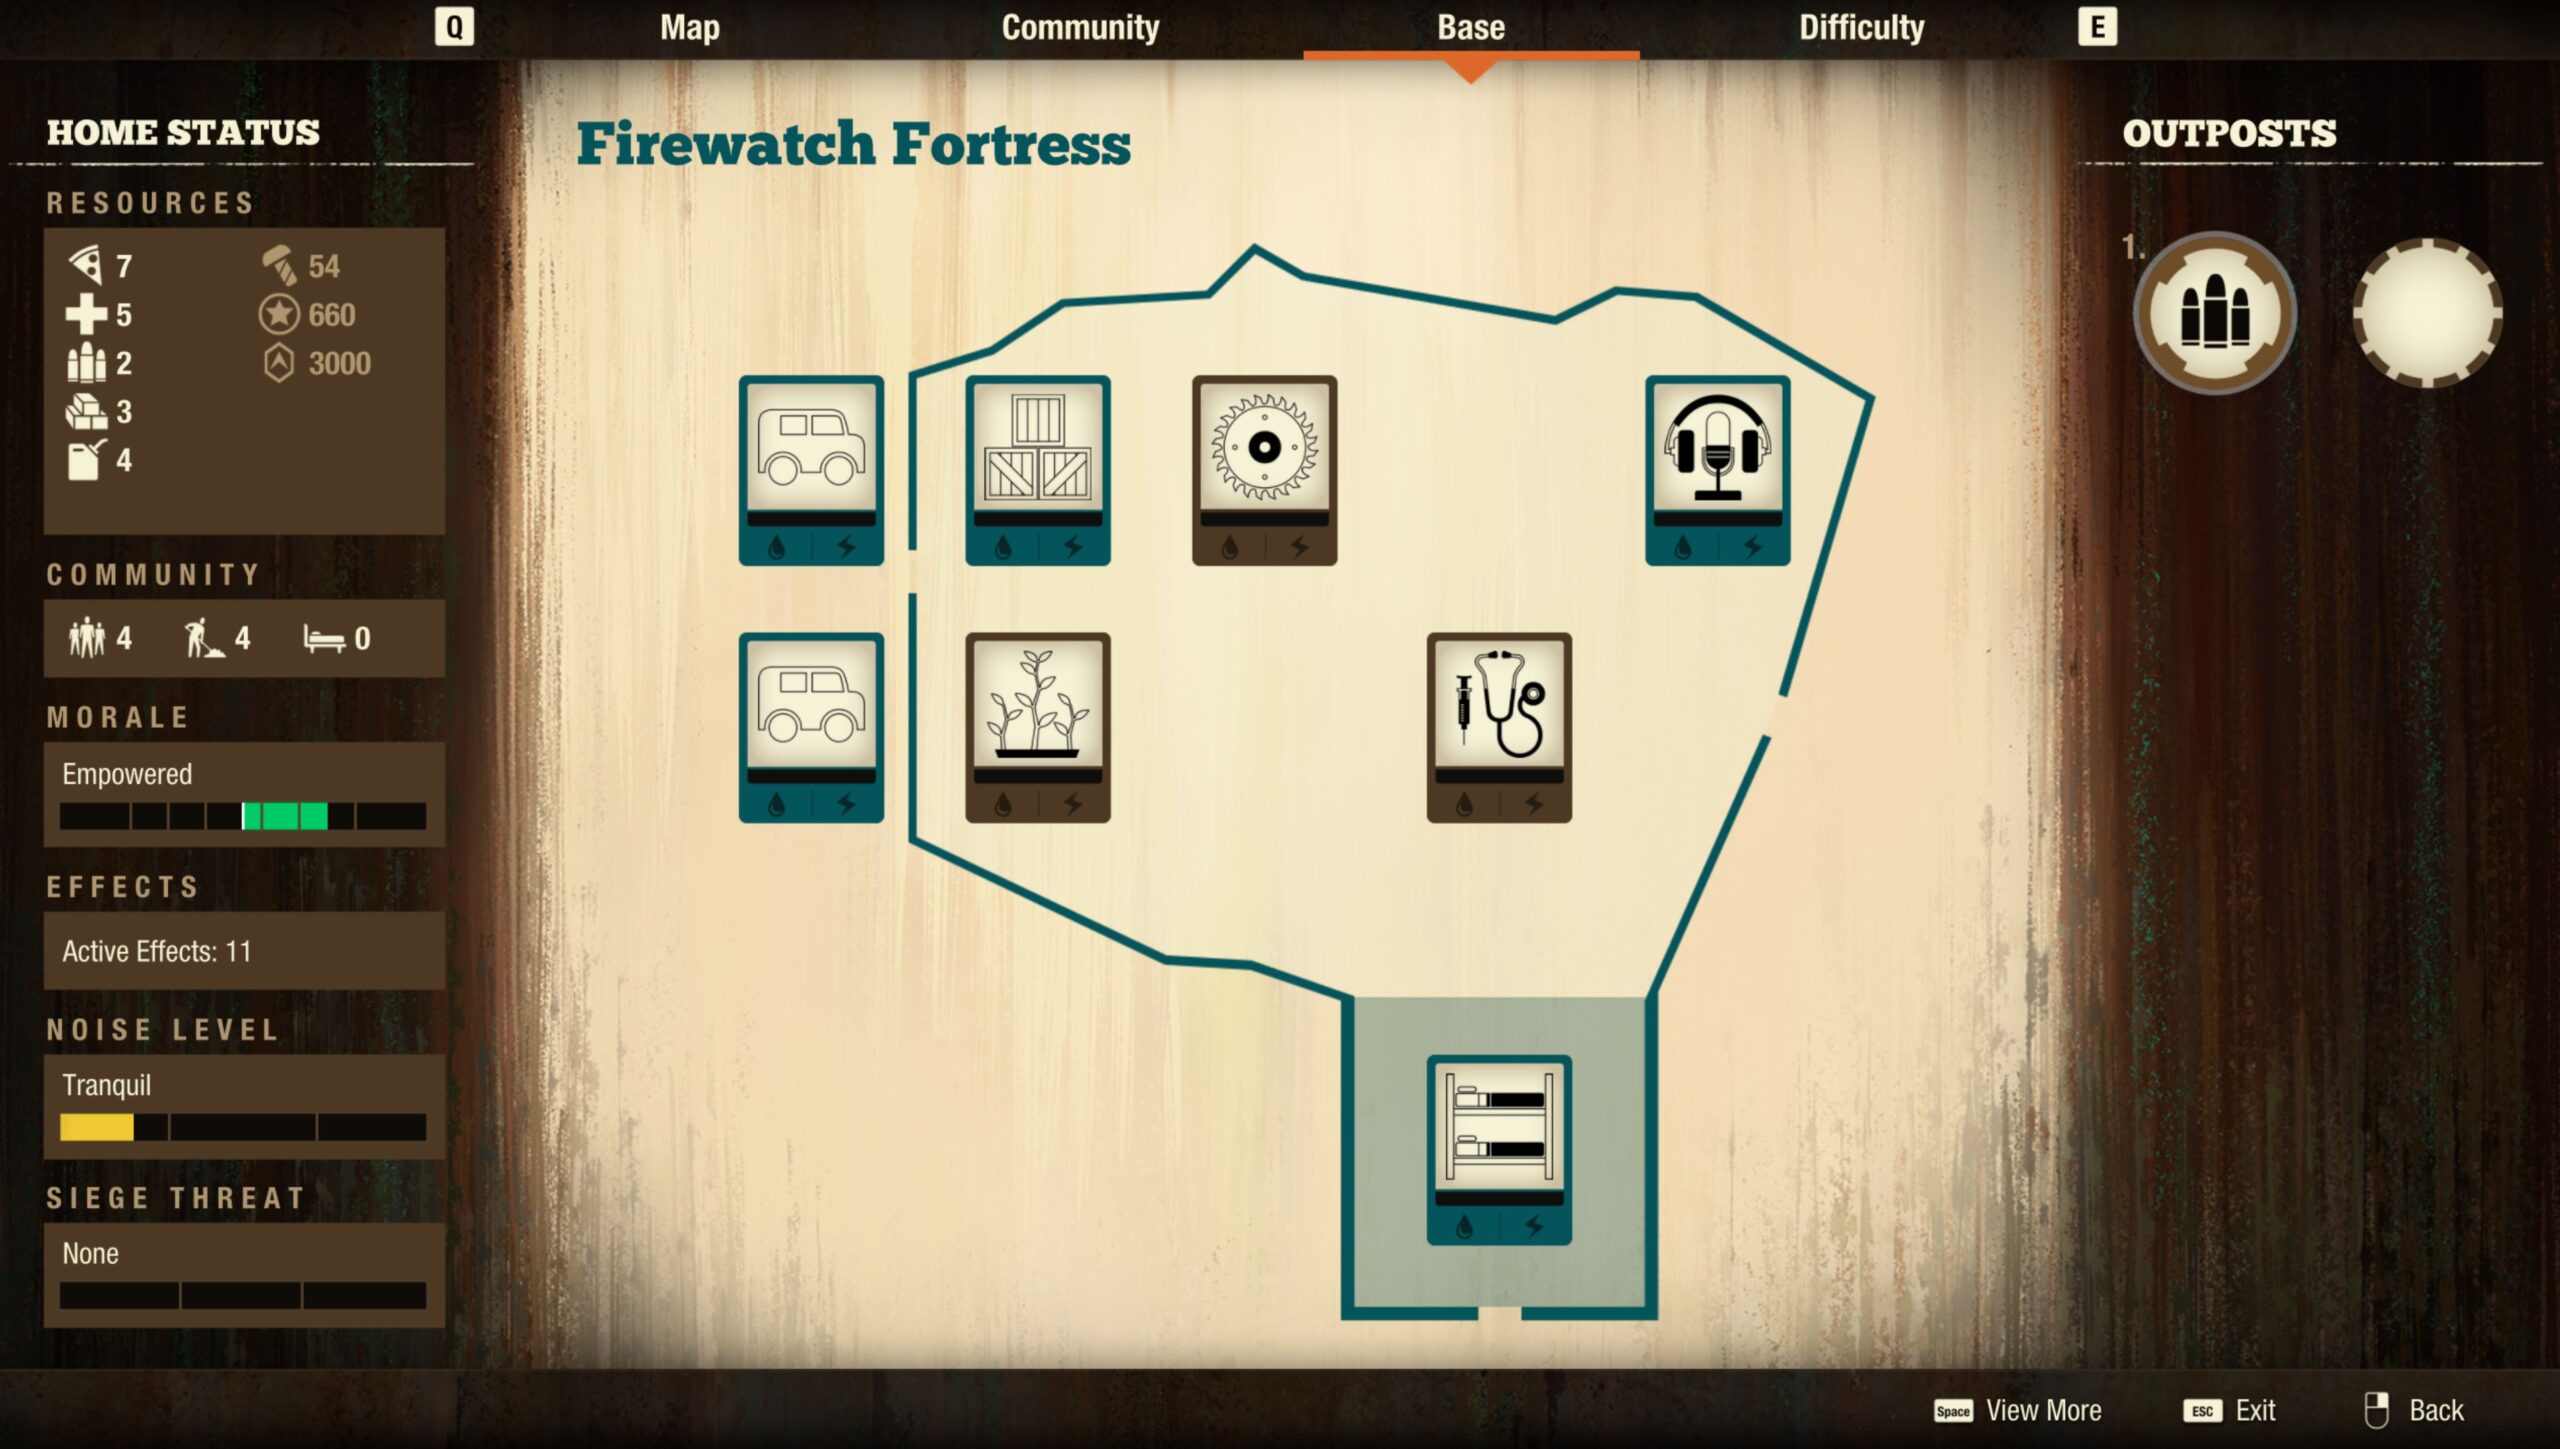
Facilities
Every base is a collection of facilities, each of which performs a number of related functions. For example, the Infirmary allows you to keep your characters healthy in a variety of ways, while a Kitchen lets you make snacks and ration your food supply.
When deciding which facilities to construct in your base, the choices can be intimidating. If you’re not sure what to build next, use these suggestions to guide you.
Start with the facilities you need most.
The game’s tutorial starts you with a base that has an existing Infirmary, and the first facility you’re directed to construct is a Workshop. These two facilities are the pillars upon which your community thrives. The Infirmary keeps your survivors healthy, and the Workshop keeps your weapons in good shape. Without these two, it’s hard to survive for long.
A place for everyone to sleep is the next most important addition to your base. If you’re short on beds, your survivors get cranky and morale drops. The simplest method is to construct a facility that adds beds (such as Sheltered Beds, or Outdoor Beds). Unfortunately, this takes up valuable real estate that you’ll eventually want for other facilities, so another solution is to find a nearby location that offers beds as an Outpost Effect and claim that outpost. Click here for more on outposts.

Another useful function of your facilities is to produce food. Your survivors consume a lot of food: 1 unit per survivor per day in difficulty levels Green through Dread. Survivors consume 1.5 units per day on Nightmare and 2 units per day Lethal. If you’re not growing food at home, you’ll have to scavenge for it.
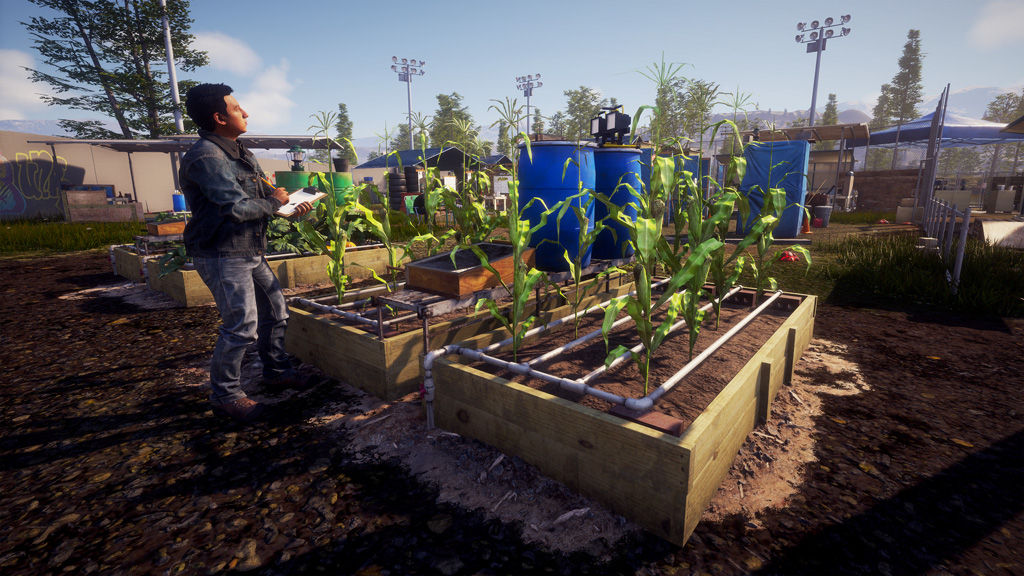
The first food-producing facility you’ll want is a Garden. Later on, you might construct Hydroponics or Farms. These facilities become even more effective when you upgrade them (see upgrading a facility), but you’ll need a survivor who knows Agriculture or Herbalism (specializations of the Gardening Skill) to fully upgrade these facilities. Hydroponics do not need to be upgraded, but the facility has high requirements to access it.
You could claim outposts that offer food income, but in most cases these aren’t as efficient as having a good food-producing facility (or two) inside your base. Leveraging upgraded outposts with food income could produce the equivalent amount of food as base facilities, but at a steep influence cost.. This strategy is more helpful in Lethal communities that consume 100% more food than communities on Green through Dread difficulty settings.
Explore other facility options.
Once these essentials are met for your community, explore how other facilities will help you pursue your preferred strategies or achieve your goals. Your choice of facilities has a big impact on your survival!
Note that some of the more powerful facilities can only be built in large facility slots. You’ll find these slots in other bases around the map.
Upgrading A Facility
Many facilities can be upgraded to provide increased benefits. When viewing a facility on your Base screen, look for an “arrow-up” icon to see if the facility can be upgraded. Highlighting this icon shows you the benefit of that upgrade. It also lists the cost to upgrade that facility, as well as any special requirements you must meet (such as knowledge of a skill).
You can’t afford to upgrade everything right away, so be mindful of your community’s needs when selecting what facility to upgrade.

Facility Mods
State of Decay 2 offers additional customization options for your base in the form of facility mods. Facility mods are items that you can find scavenging, such as a Shelving Unit (giving that facility additional storage) or a Portable Generator (giving that facility temporary electricity).
If you bring facility mods home, you can use your Base Screen to add that mod to an appropriate facility at no cost (other than a little time and labor).
Each mod provides a different benefit or new function, and you can swap out facility mods with just a few minutes of time. The choice of which mod to use on each facility gives you more control over how your community continues to flourish.

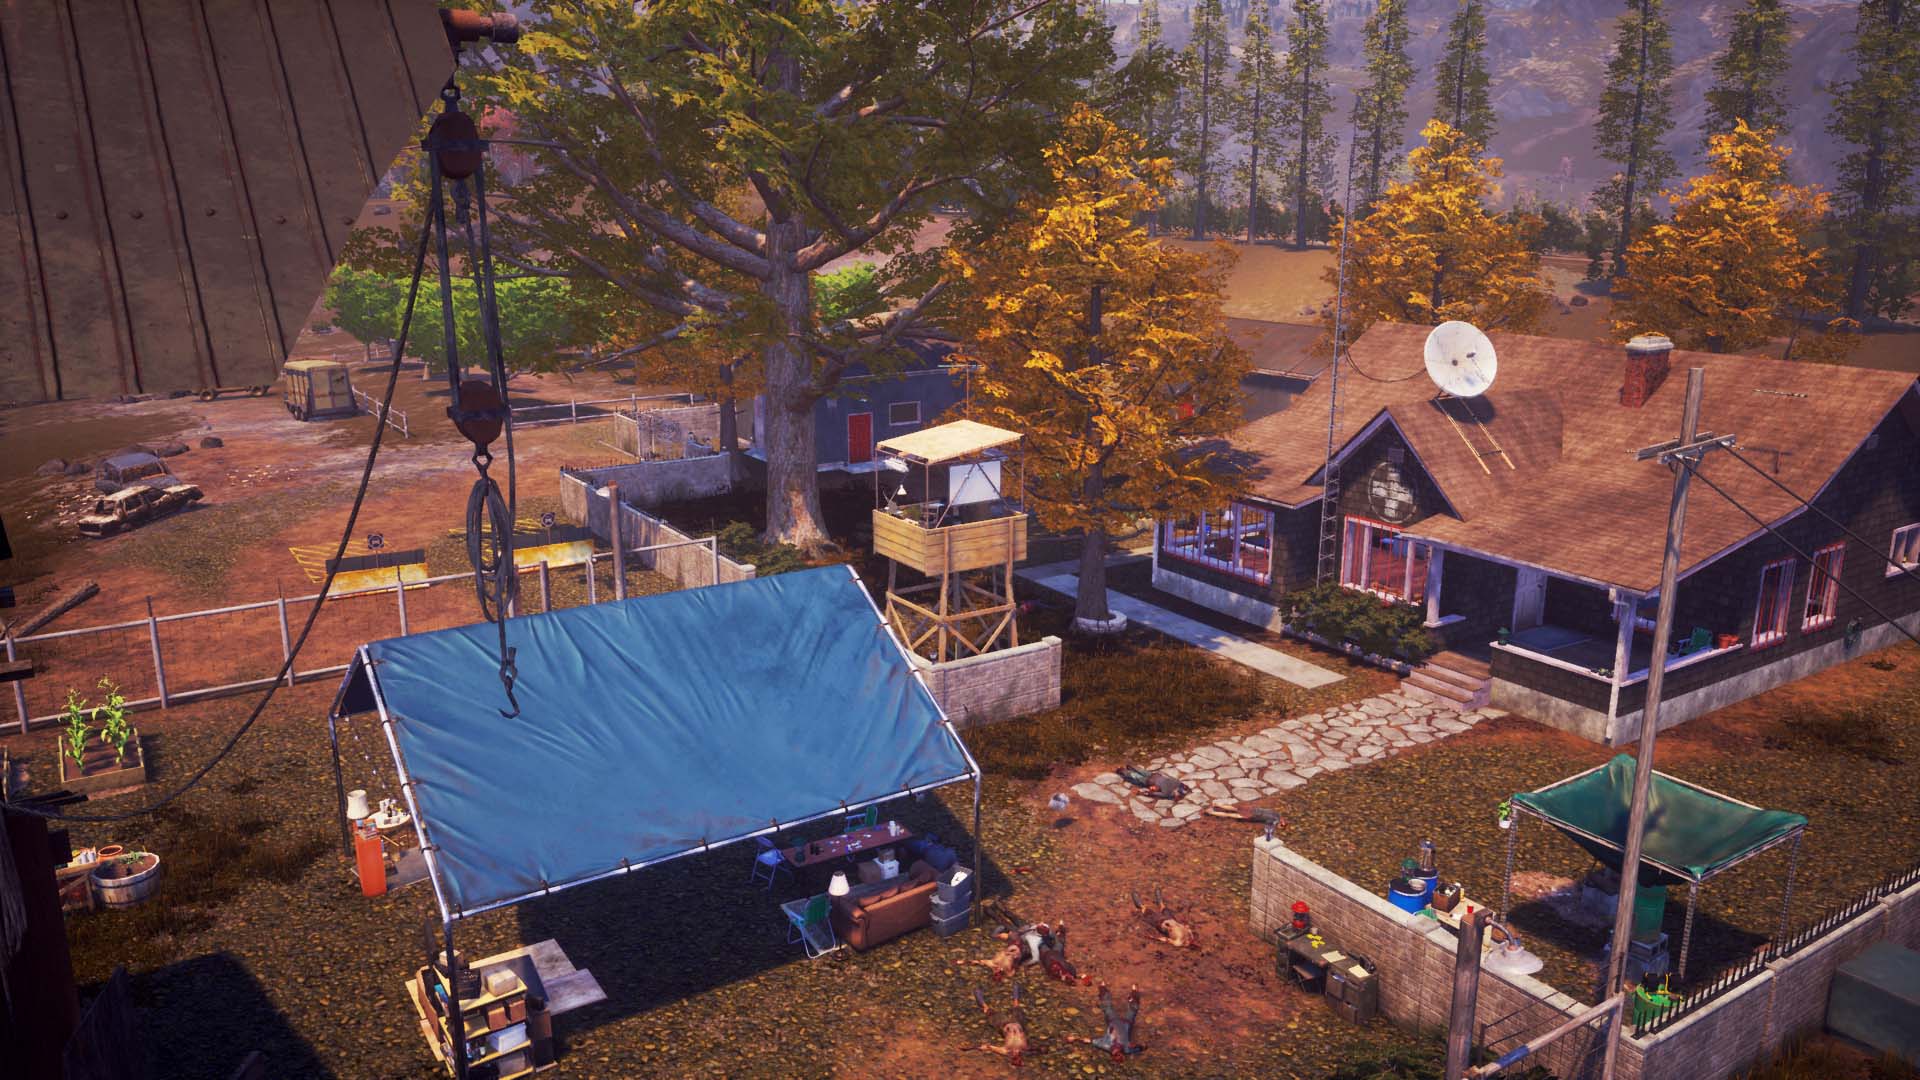
Switching Bases
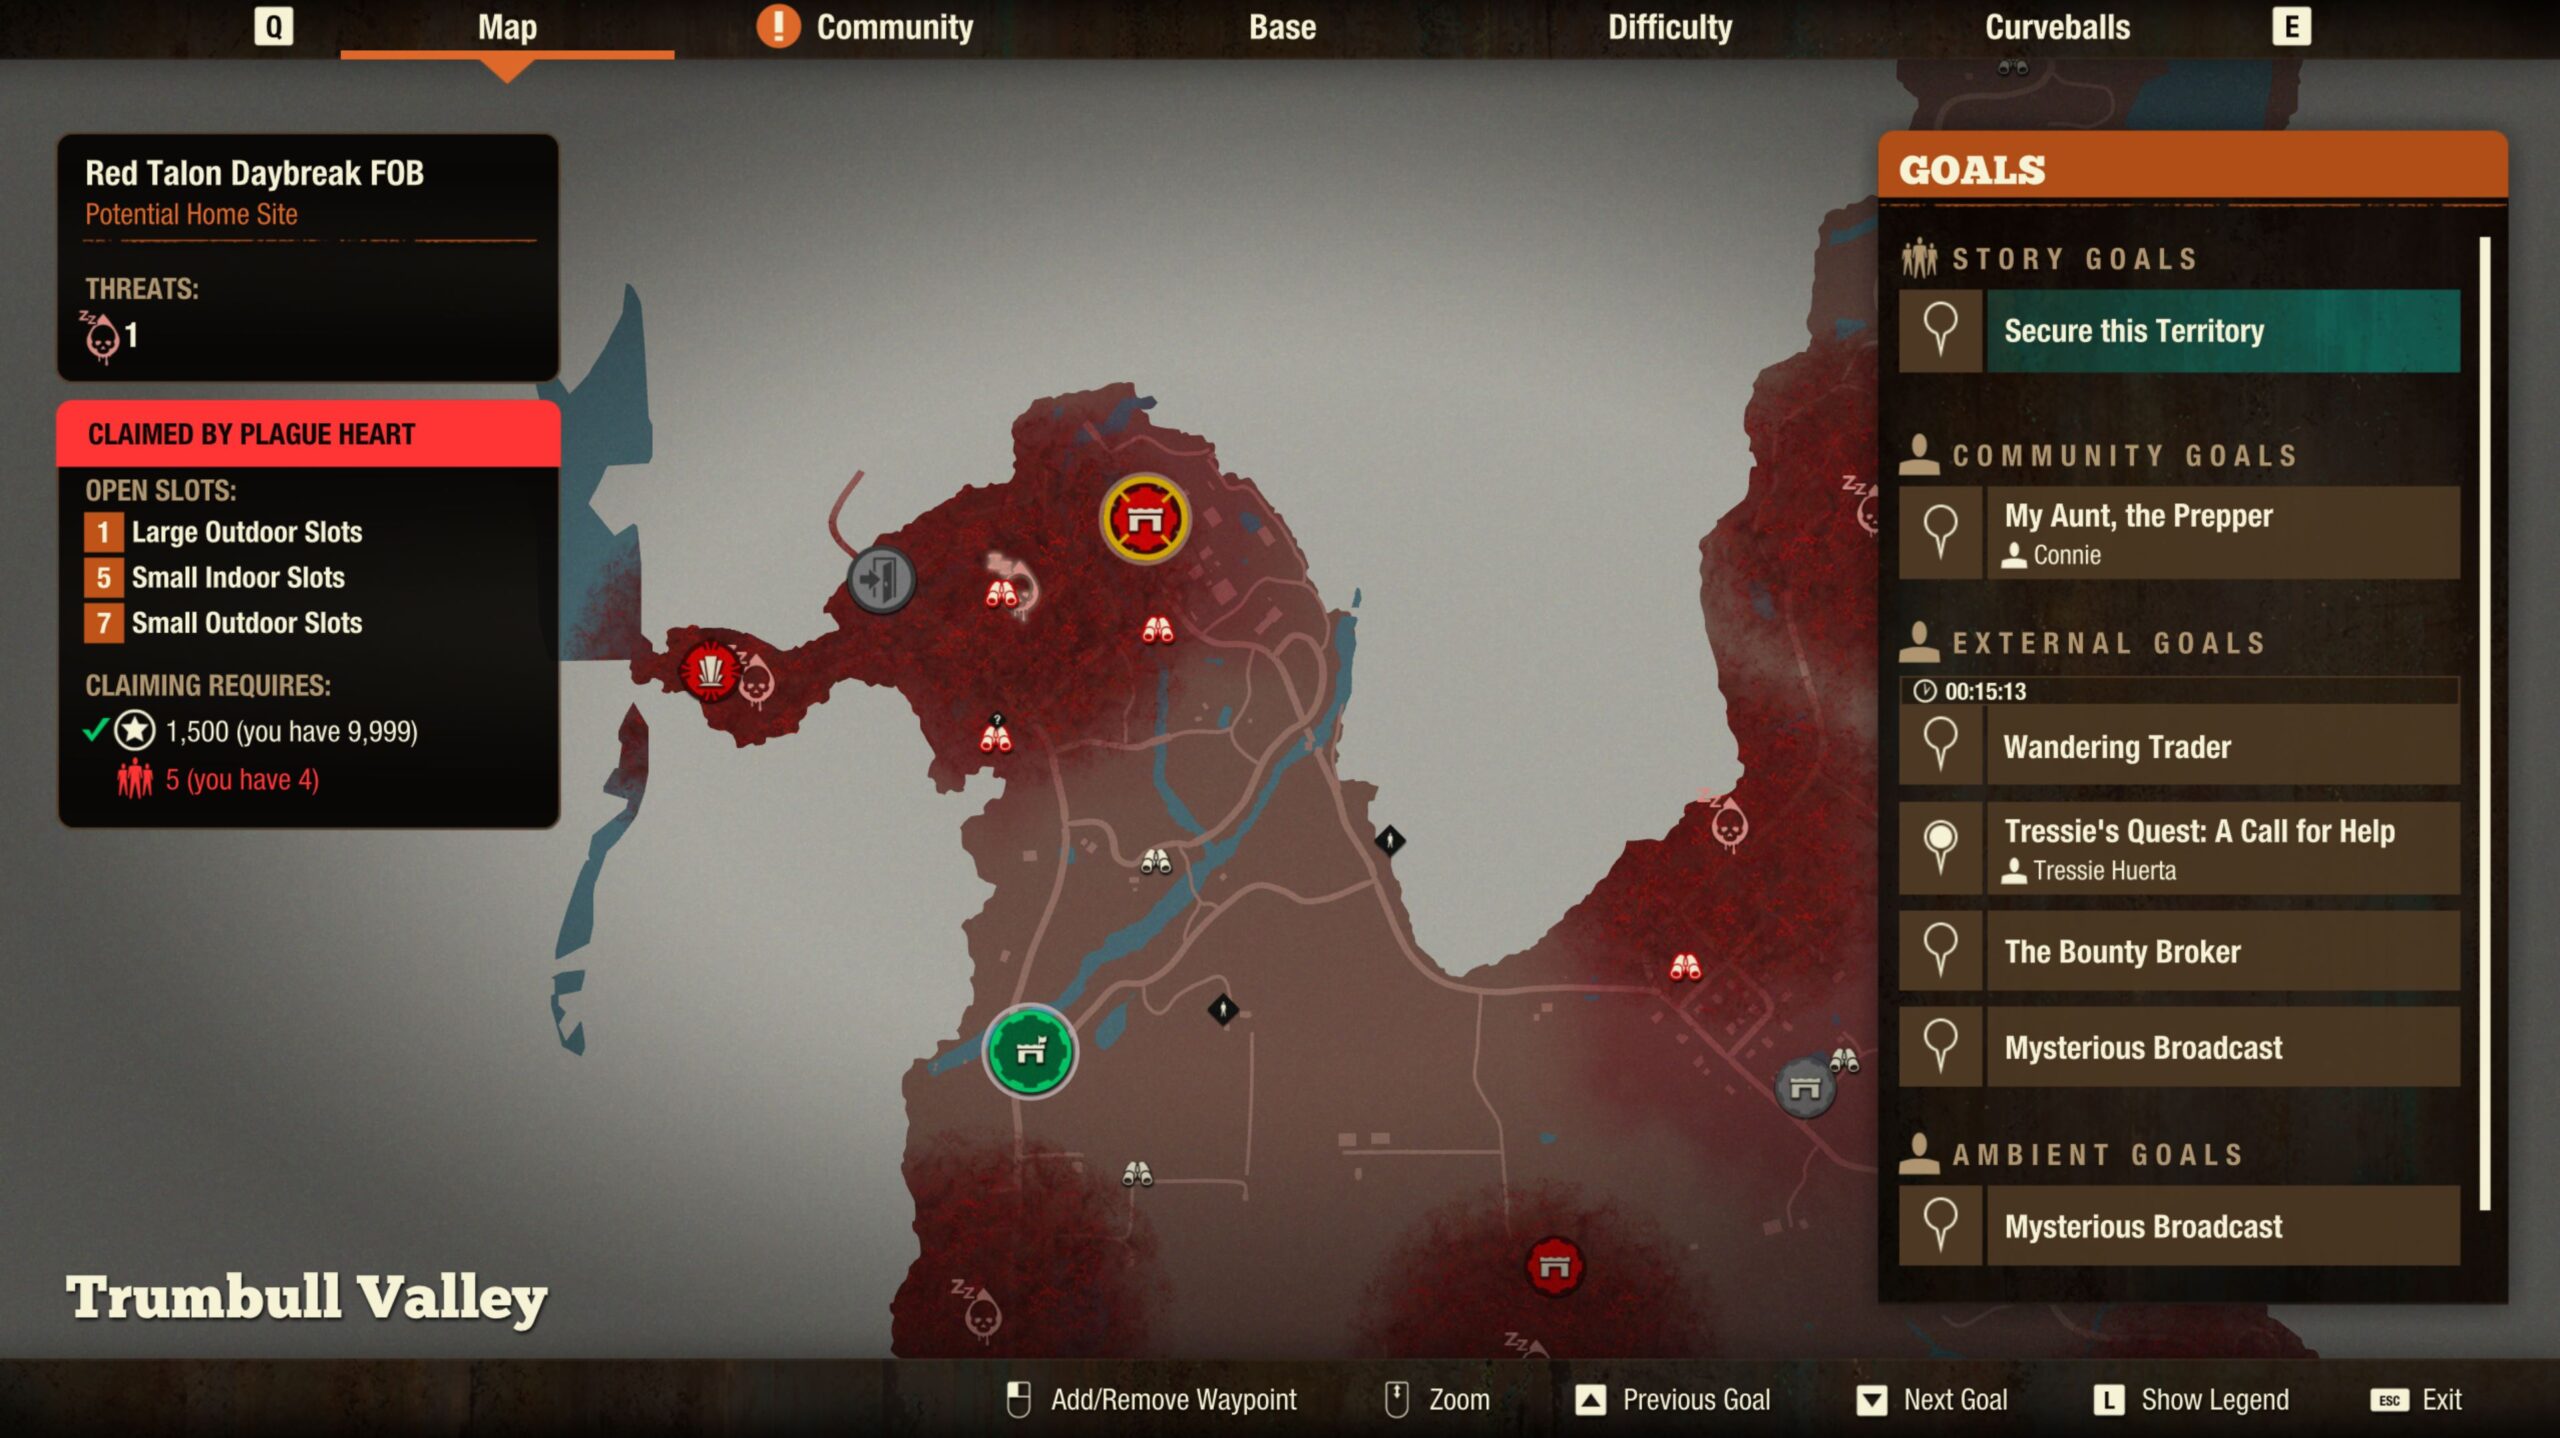
As you become more adept at surviving in the apocalypse, your community will grow. You will need more beds, more food, and more room for newer, bigger facilities to grow and thrive. The good news is that every map has a variety of home sites, each with its own character and options. Explore the other home sites on your map until you find one that fits your needs.
Each home site requires a minimum survivor population and costs influence to claim it. The larger bases require a significant population and lots of influence, so you might have to work a bit before claiming one of these locations as your home. Some bases could also be under a plague territory’s influence, and cannot be claimed until the nearby plague heart is destroyed. See Plague Territories for more information.
All of your inventory in the supply locker and storage, along with any cars parked in parking spots, will follow you to your new base. Any upgrades done to your command center will also still be available. All costs put into upgrading other facilities will be refunded. Because of this, your material storage is likely to be out of room right away, but don’t worry, it’ll give you time to rebuild all the facilities and bring down the amount of material stored before wasting those resources.
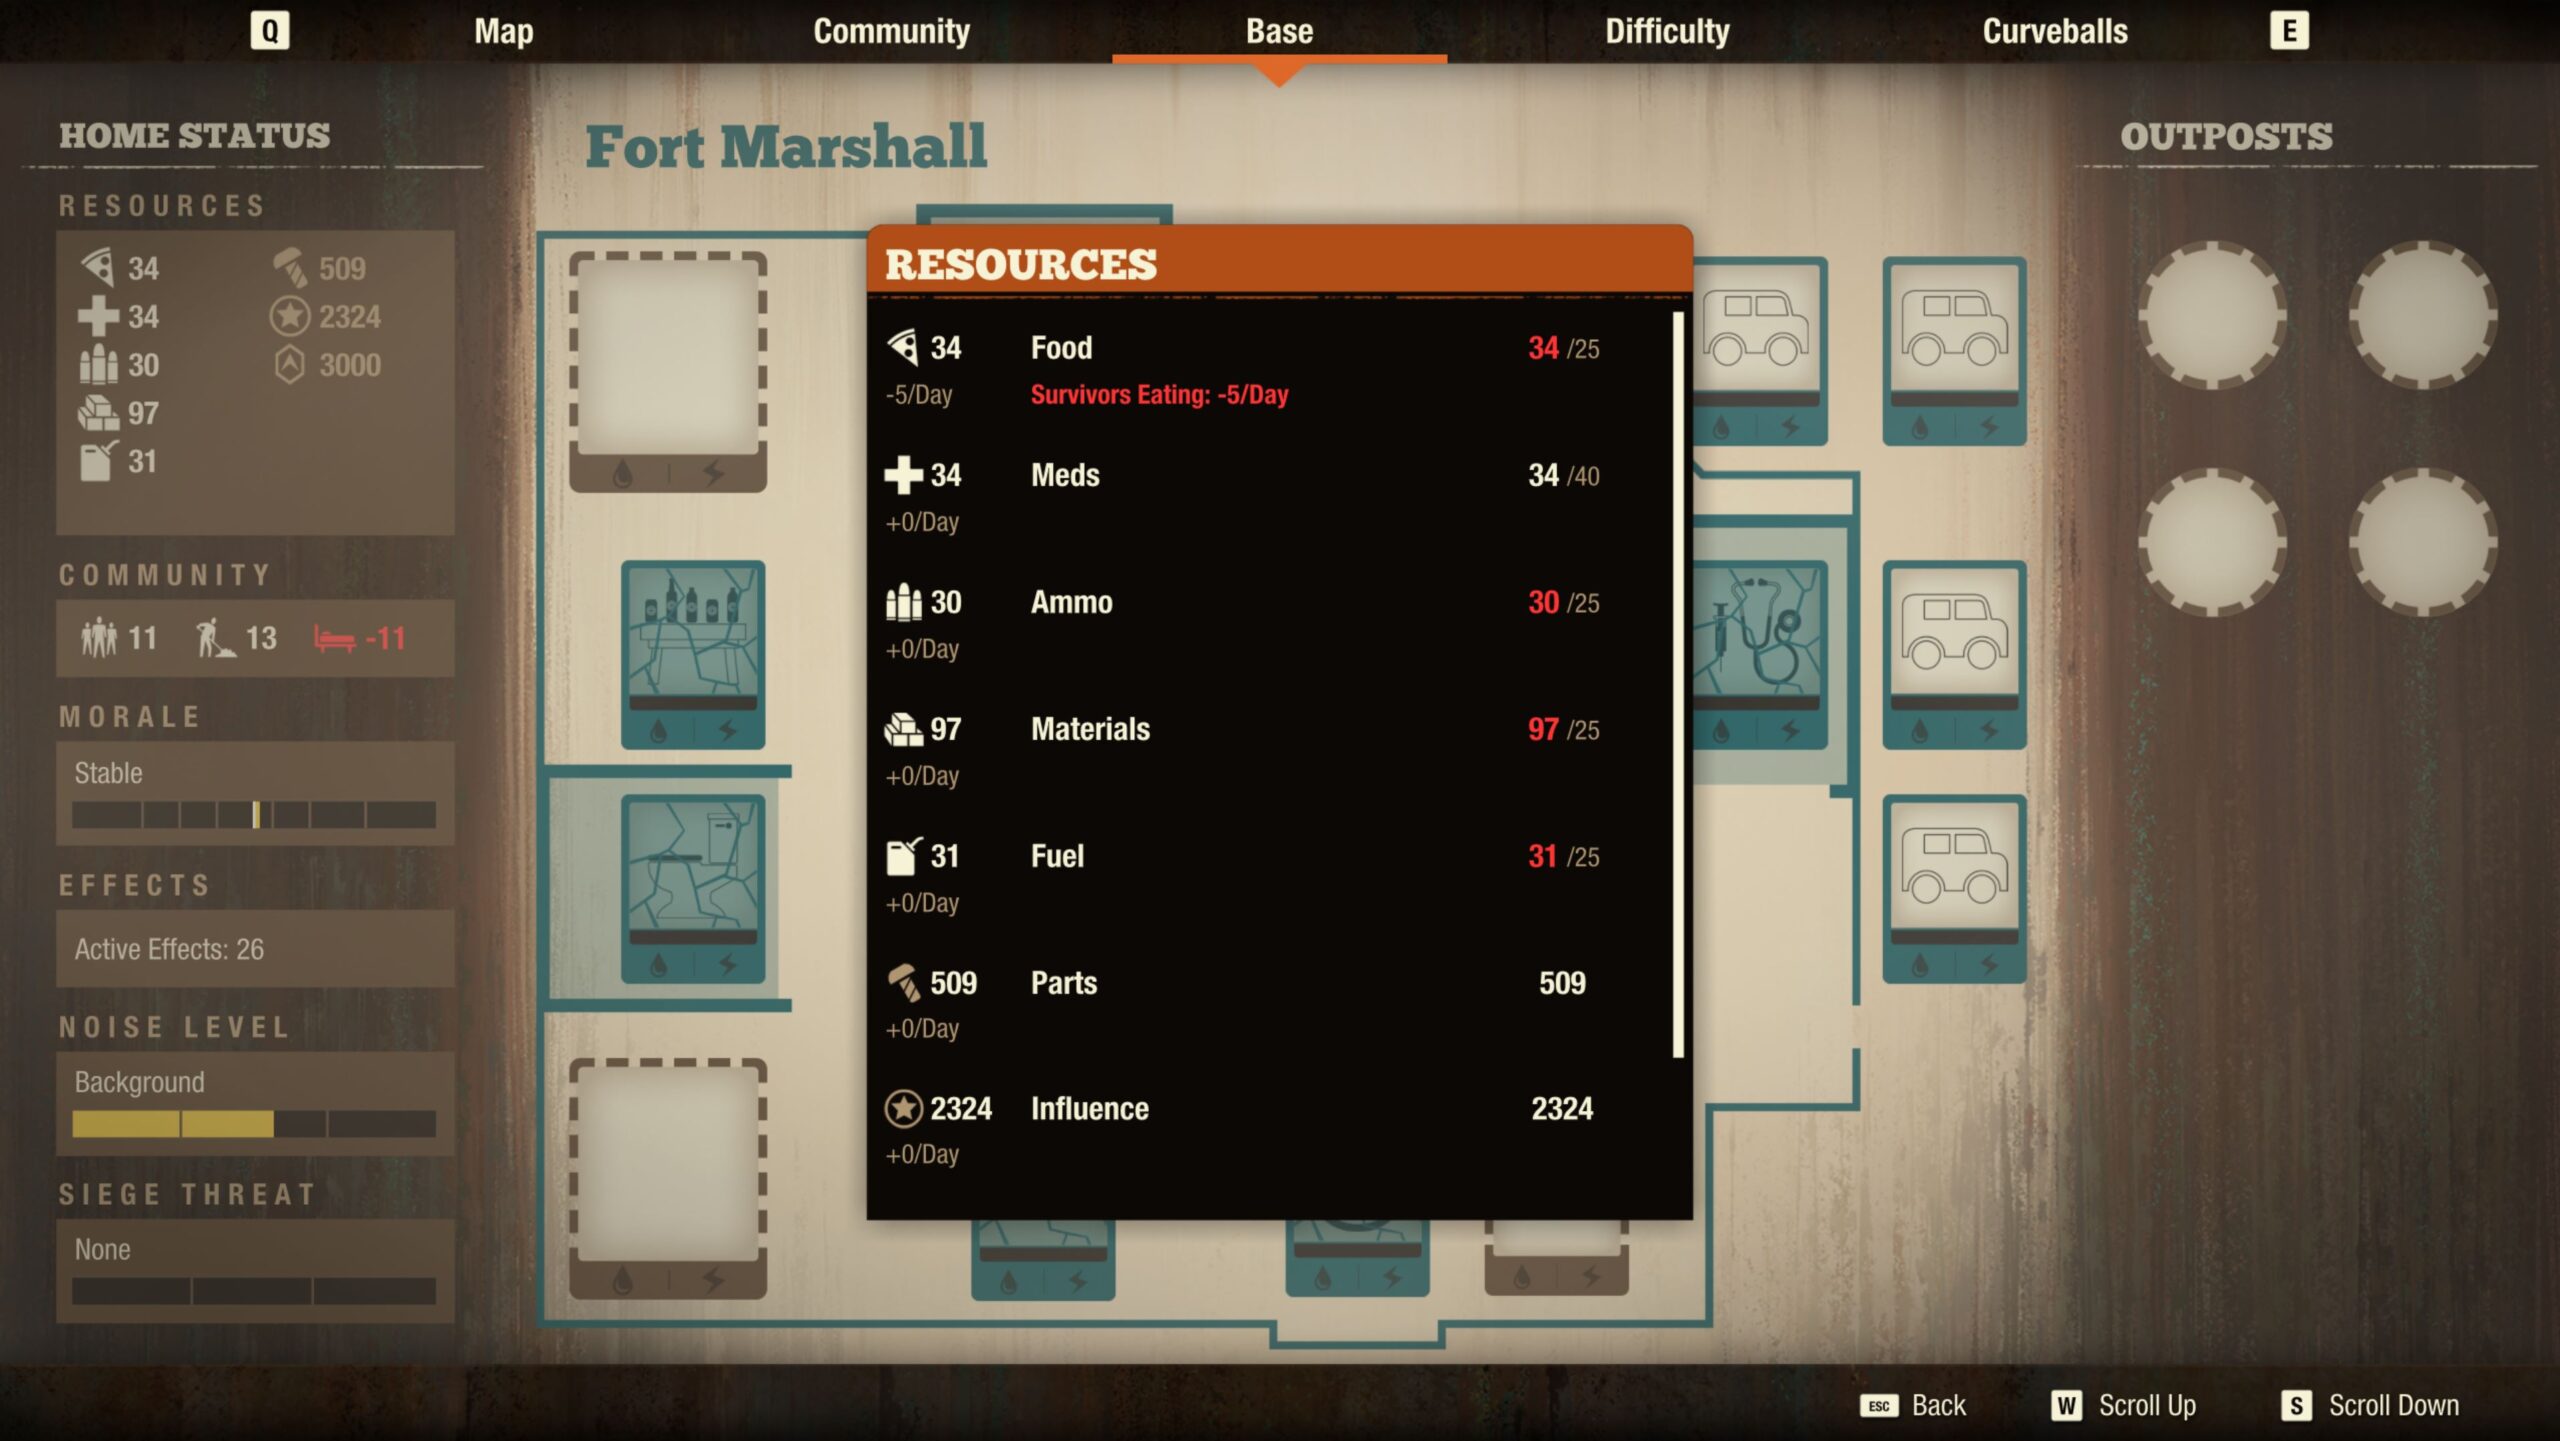
Resource Management
Survival in a post-apocalyptic world comes with a cost. Not only do your survivors need food every day, but some of your facilities and outposts might have daily upkeep costs or fuel costs. These daily costs are actually divided by two, with each half-day cost being applied every 12 hours. For example, if your survivors consume 6 food units each day, you’ll see 3 food units deducted from your supply every 12 in-game hours. Your community’s morale depends on you having enough food and supplies. (See Morale for more information on your community’s morale.)
Important note: keep an eye on your storage facility, and make sure you have enough storage space for the incoming rucksacks. You may need to upgrade your storage or your community will start to waste or lose your supplies.
Rucksacks 
You will need to scavenge and find rucksacks to deposit into your base’s storage to keep up with the demand. Only unopened rucksacks can be deposited and counted toward your community’s supply, so only open a rucksack if it’s an absolute emergency! Each survivor can only carry 1 rucksack at a time, so when scavenging make sure to bring a car with a big trunk and a follower to help carry the load. When carrying a rucksack you will be slowed down, so try to stay out of any zombie fights until you get a chance to unload.
Unlike the rest of your supplies, rucksacks can only go into your base’s storage, or an upgraded outpost.
You can view your community resource count in the Base Menu. Click on the resource to see even more details about how much your community consumes and how much storage is available.
Finding Supplies
Facility construction, actions, and upgrades all require supplies. The resource you’ll need most often for facility management is materials, but facility actions and upgrades could also require meds, parts, or many other kinds of supplies. Usually, you’ll gather these supplies by scavenging whatever’s been left behind at the various buildings around town.
You’ll need to survey the map, either by visiting areas close up, driving around in a survey car, or most commonly visiting each survey point. This will reveal buildings, cars and even hordes on the map. After they’re unlocked on the map, you’ll be able to get details on resources you’re likely to find at each location.


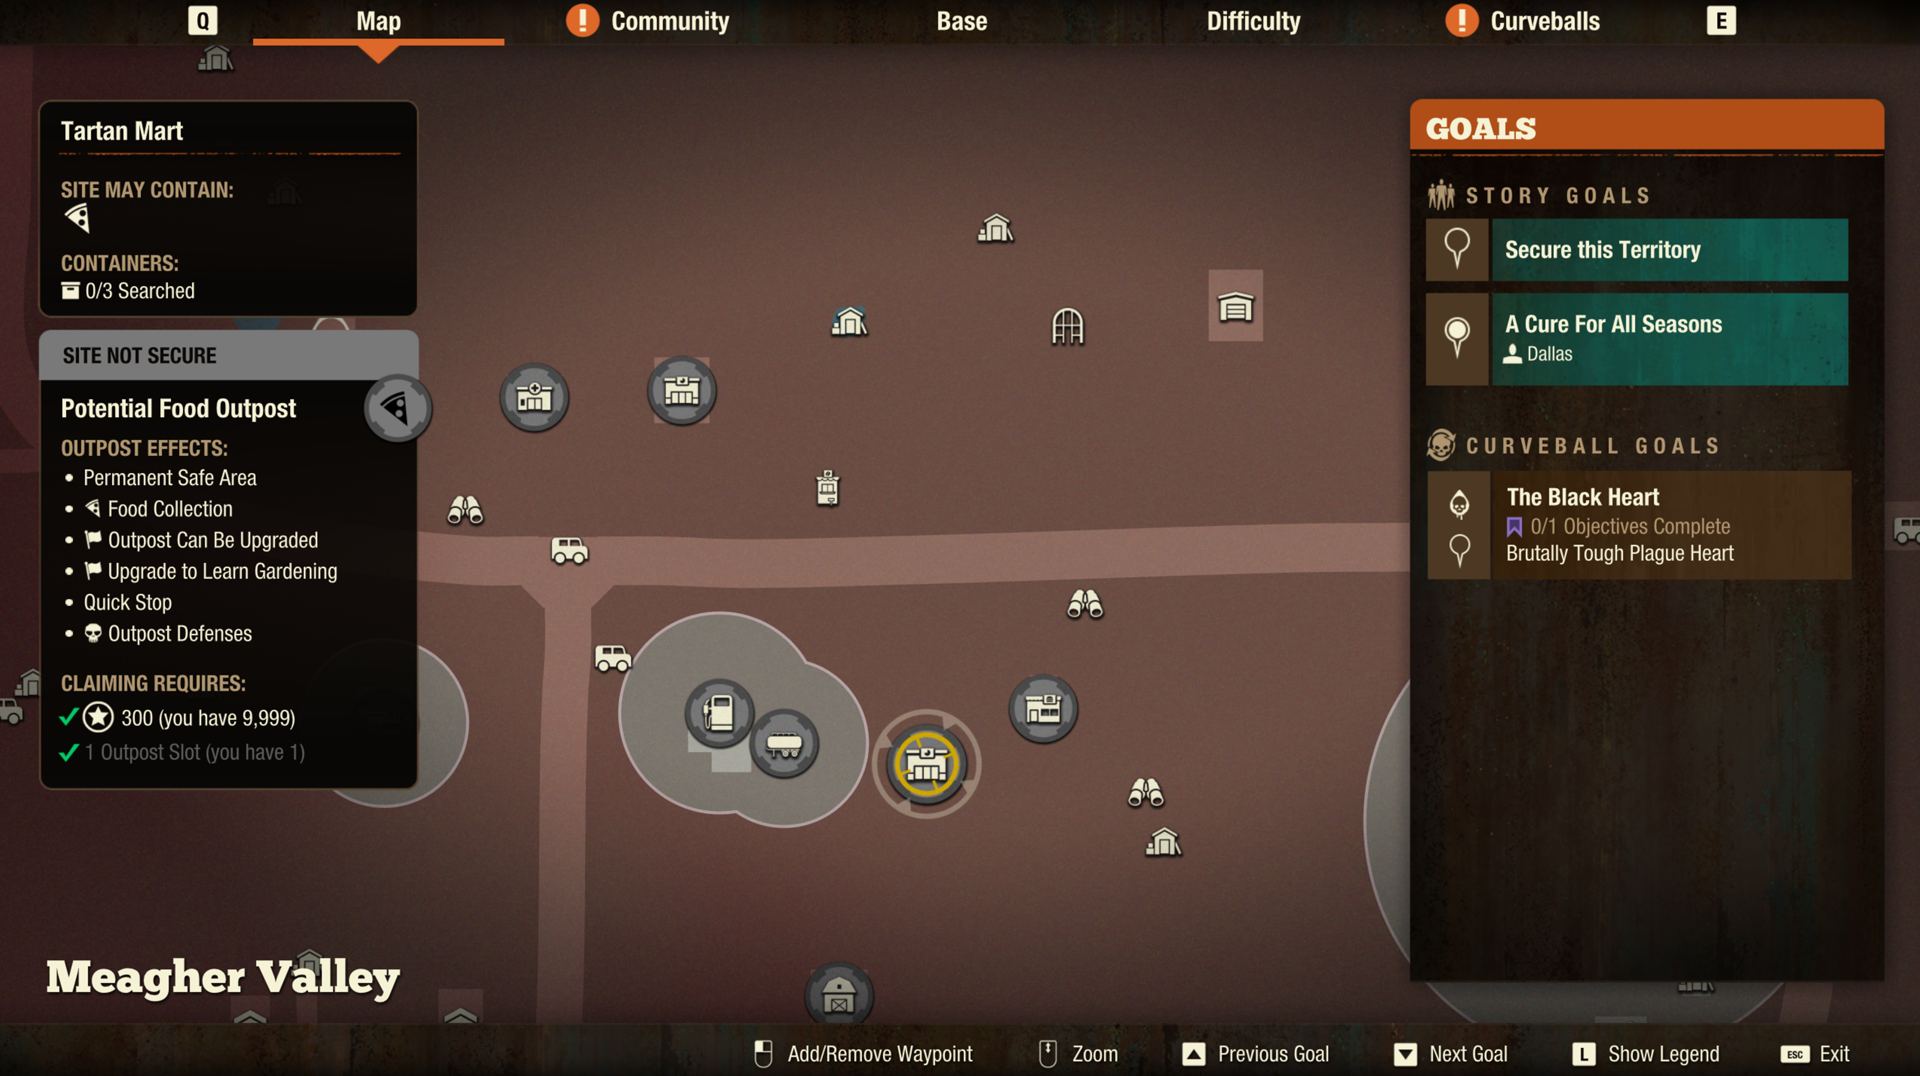
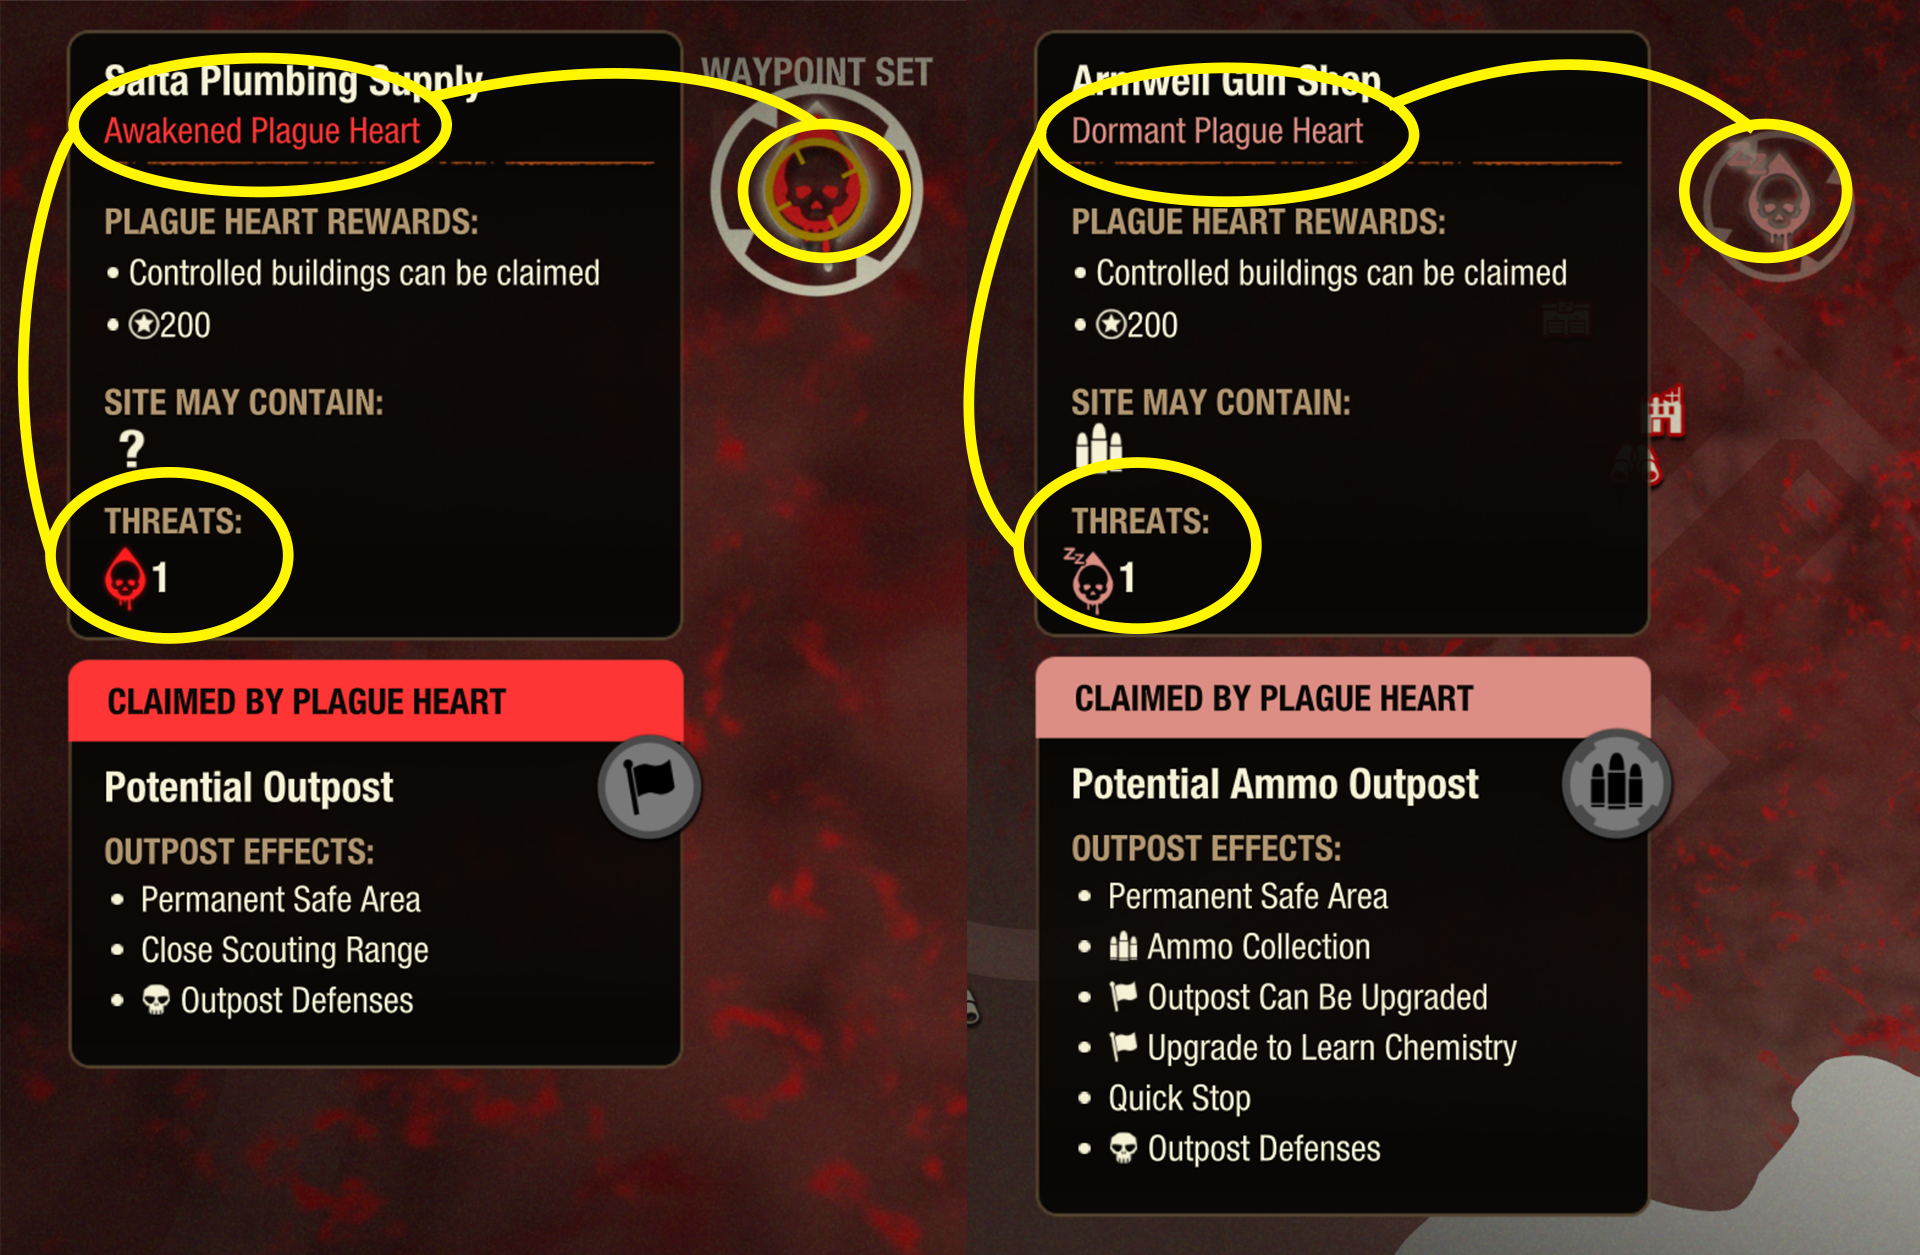
Once you’ve surveyed an area, open your map screen and highlight a particular site. The type of supplies you can find there appear as icons in the site description (see the image). Sites that have Food, Meds, Materials, Ammo, or Fuel symbols guarantee you will find rucksacks of that resource. Sites that show multiple icons provide some or all of the resources shown. For other needed supplies, such as parts, chemicals, or circuitry, use your intuition and search places (or objects) that seem most likely to have the needed supply.
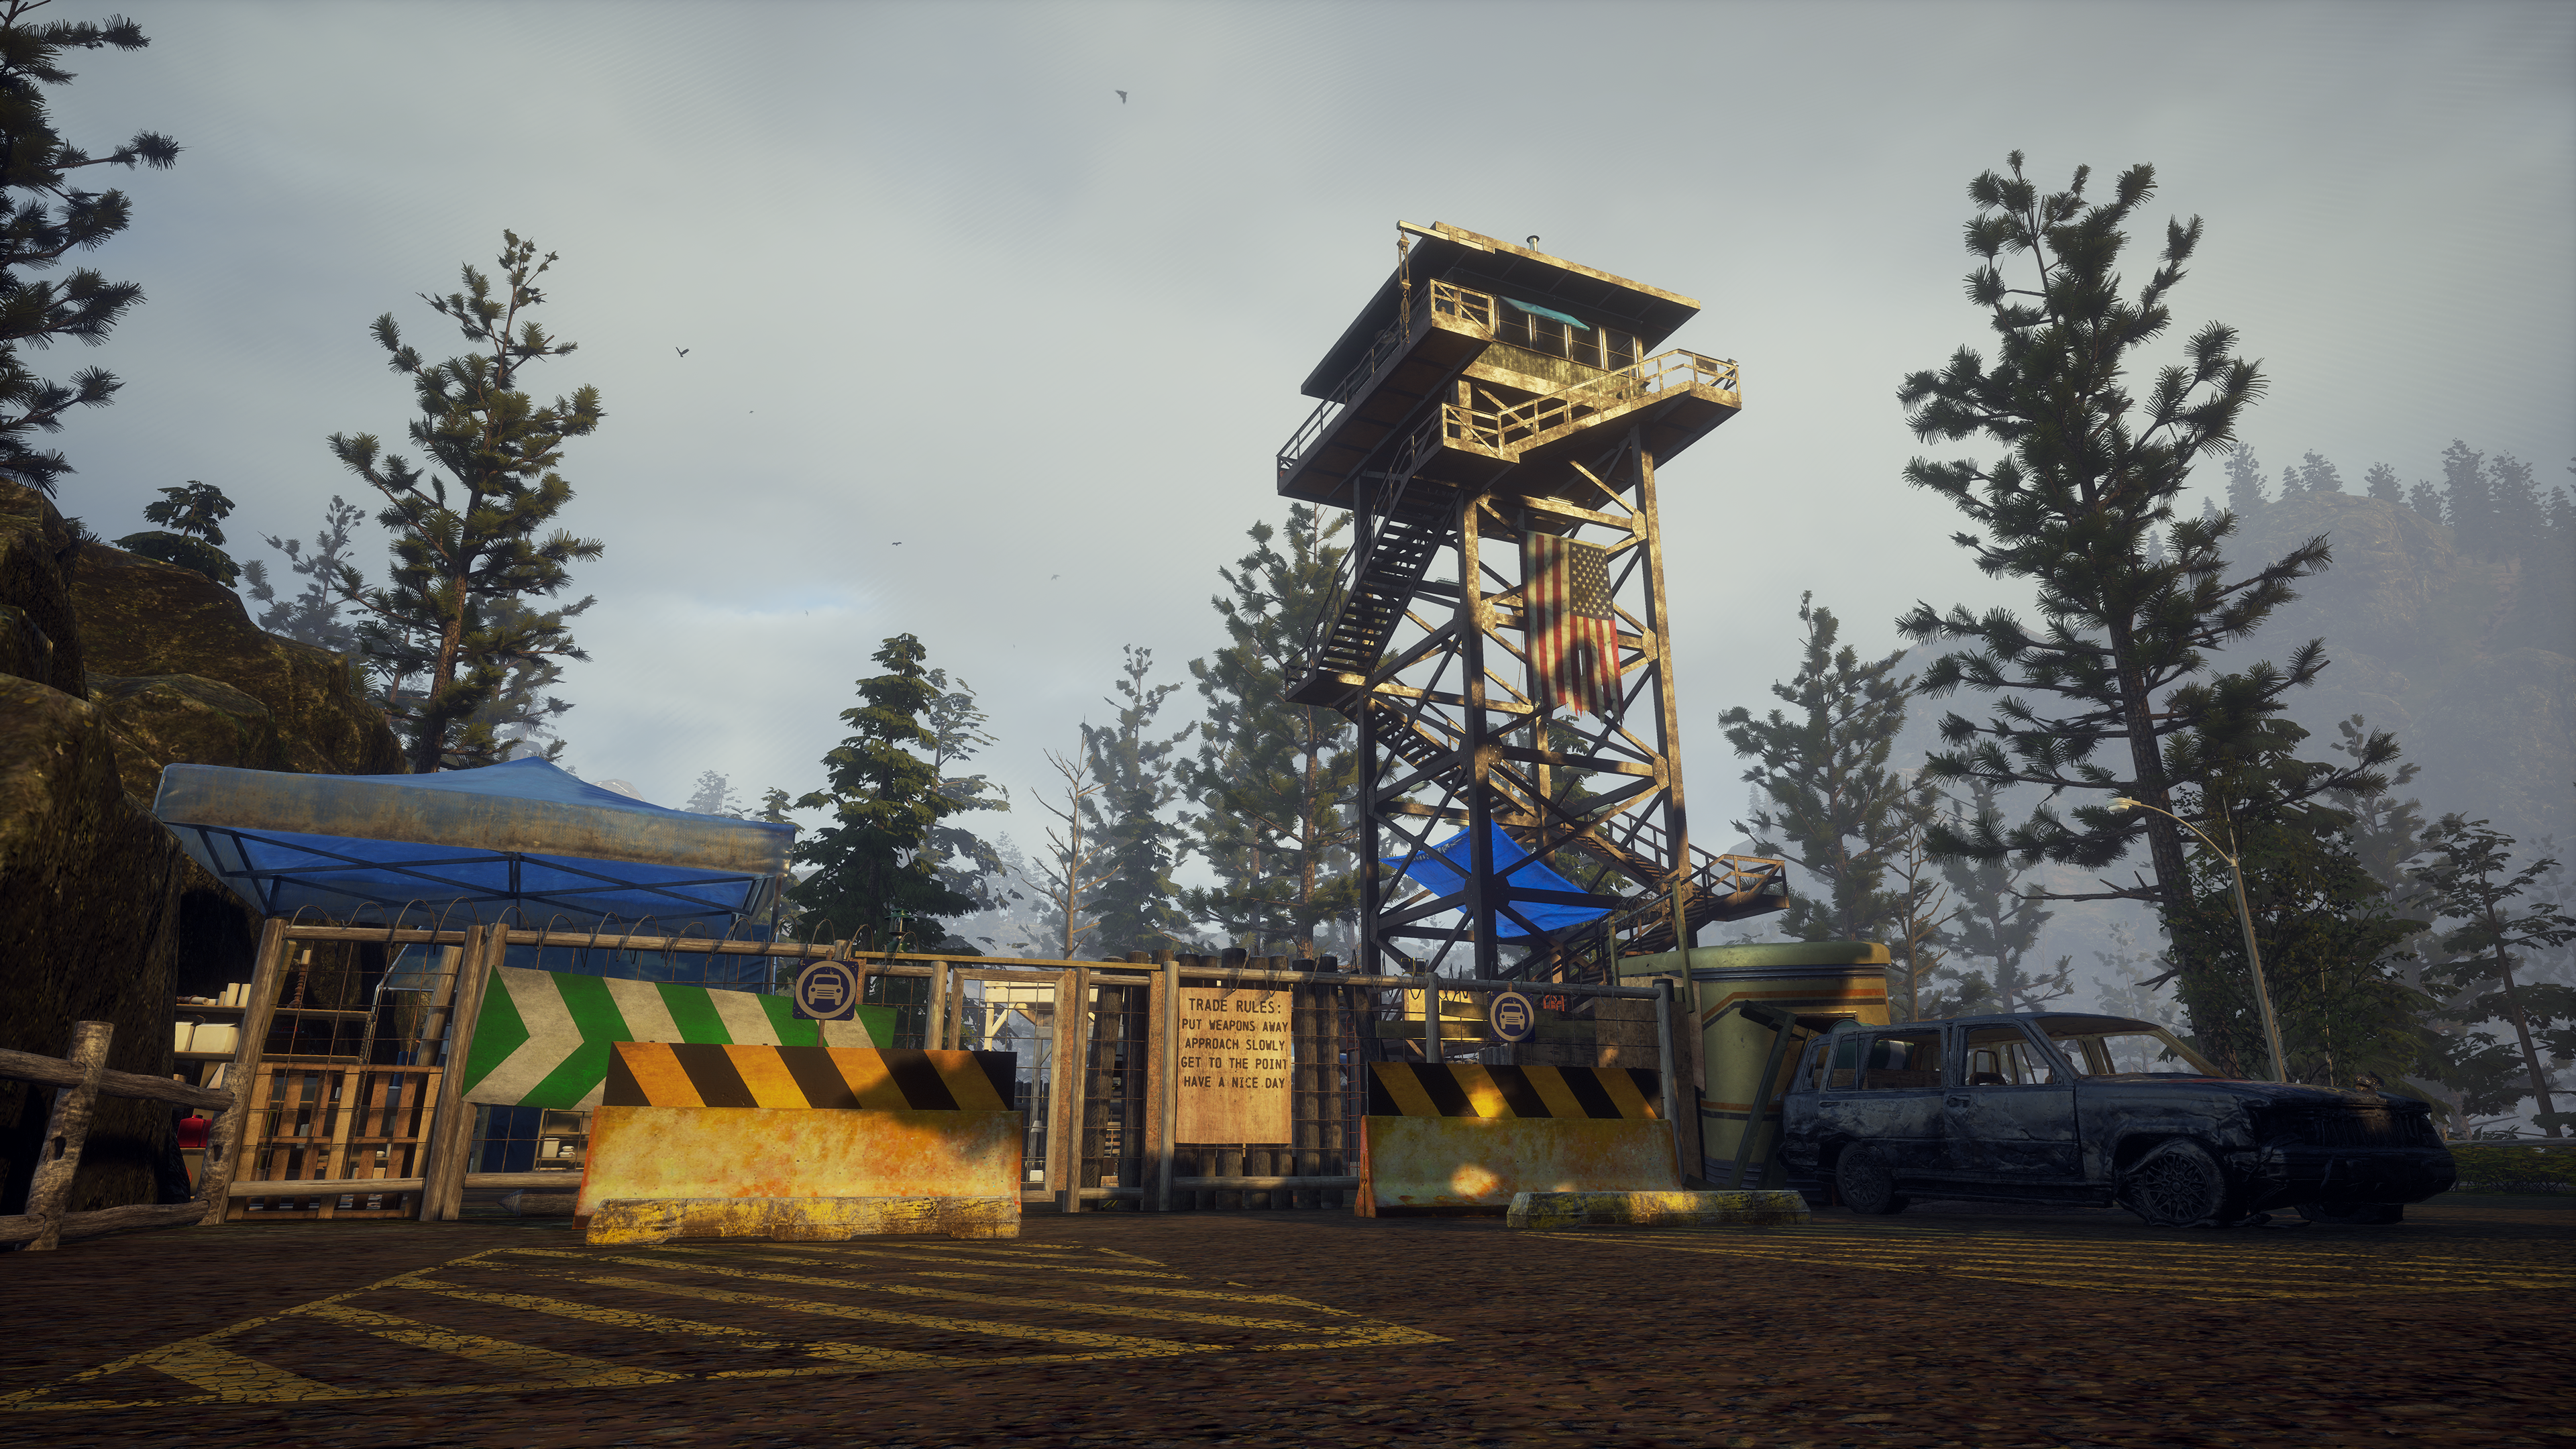
Outposts
Outposts are like facilities that exist outside your base. Instead of building an outpost from scratch, you gain its benefits by visiting a building, clearing out the zombies, and claiming it. Each outpost offers specific benefits to help your community, from “Two Beds” to “Fuel Collection” to “Power Supply.” Once an outpost is claimed, you can access your supply locker and switch characters at that location as well.
Be sure to check the building’s description on your Map Screen to see its Outpost Effects before you claim it. Not all buildings offer equal outpost effects, so don’t waste your time unless the benefit is worthwhile. If you do regret an outpost choice you can abandon it from the base screen by clicking on the one you want to leave and choosing abandon. It’ll free up a slot for a new choice, but you will only get a partial refund for the influence you spent to get it and upgrade (if upgraded). The amount refunded depends on your level of difficulty or the community effects applied.
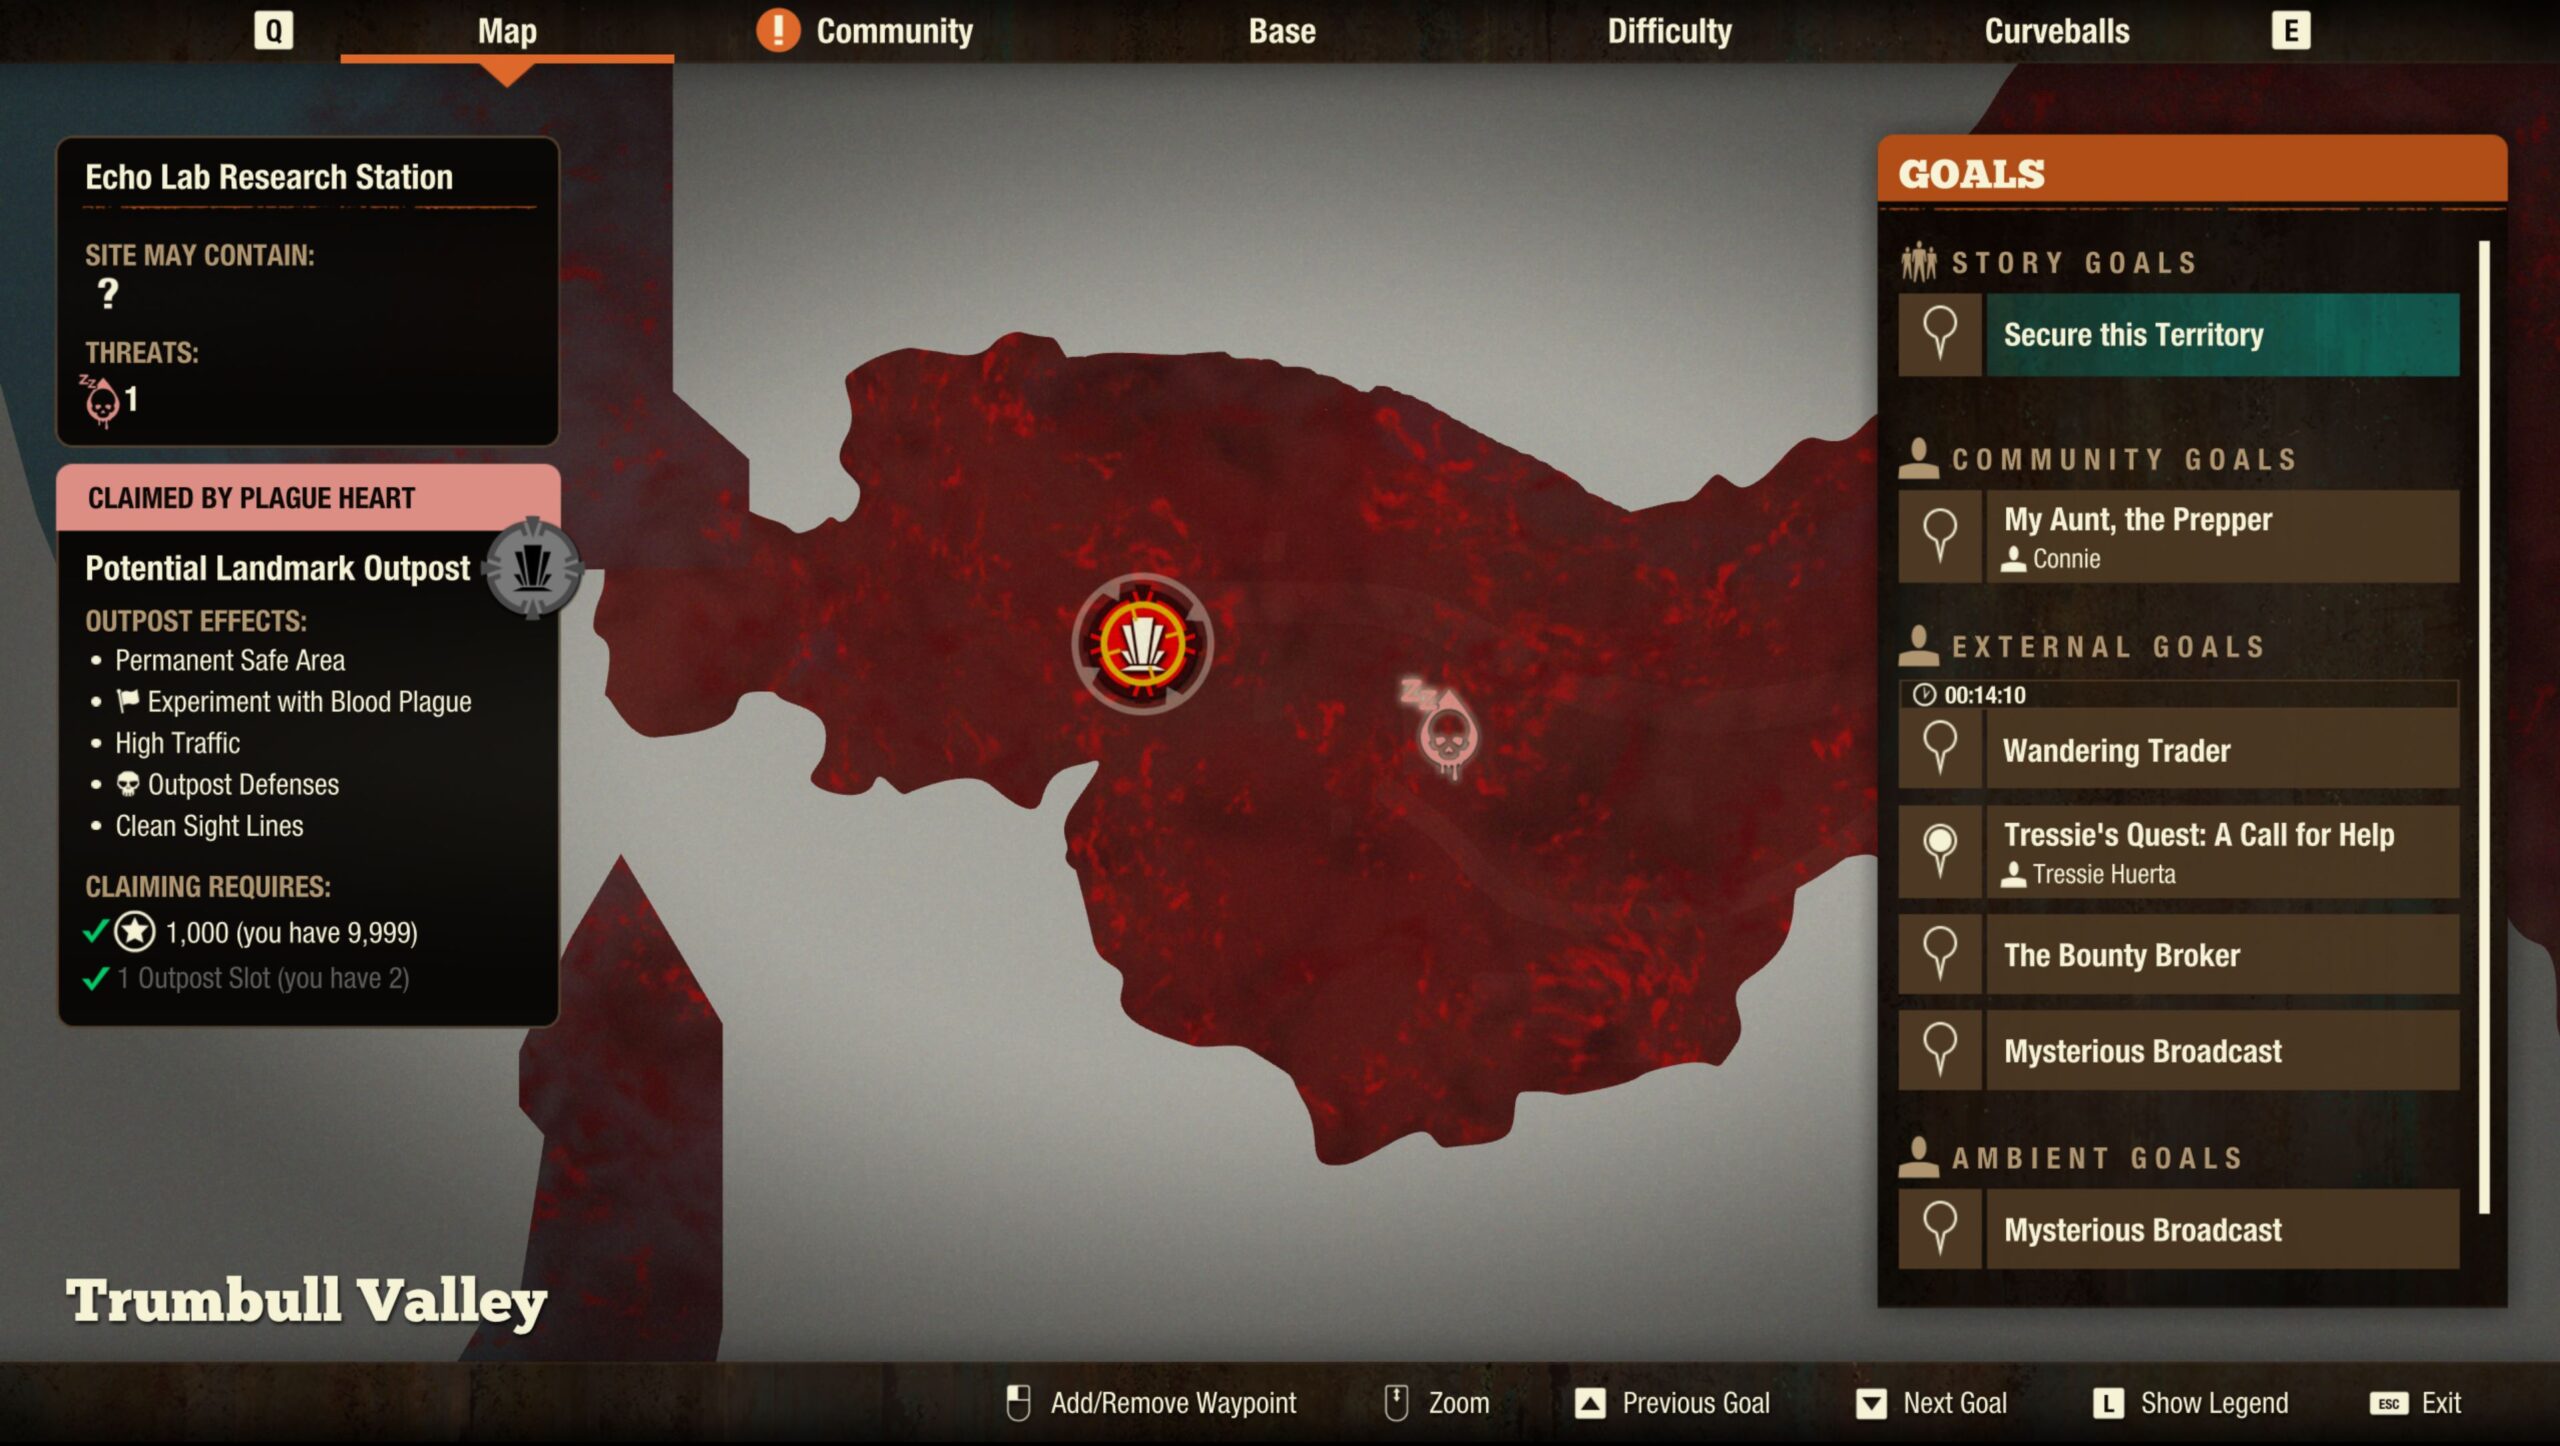
If the site doesn’t list any Outpost Effects, that building can’t be claimed as an outpost. You will also not be able to claim outposts in a plague territory until you defeat the nearby plague heart. See Plague Territory for more information.
Particularly valuable outposts (landmark outposts, upgradeable resource outposts, and utility outposts) are marked with distinctive backgrounds on the map screen, allowing you to identify them more easily. So get out there and explore your options!
Upgrading Outposts
Resource Outposts, those that grant income of food, fuel, or other resources, can be upgraded to unlock increased benefits and skill training options for your community. Another bonus to upgrading your outpost is you will unlock the ability to deposit rucksacks at that location instead of having to head back to base.
Each map features a single landmark outpost – a unique claimable site that offers three distinct strategies, each providing a powerful benefit to your community. The ability to deposit rucksacks is also available at claimed landmark outposts.
For more information about upgrading outposts see Update 25’s patch notes.

Defending Your Outpost
Outposts are susceptible to infesting hordes set out by awakened plague hearts. There will come a time when you will need to use your outpost’s defenses to not only save your outpost (and all the benefits it comes with), but also your home base! To learn how, please see Outpost Defenses.
Defending Your Base
All Plague Hearts on a given map start out dormant — that is, not actively trying to seek out and destroy your Base. However, they don’t remain dormant forever. As you explore Plague Territory, certain actions raise the awareness of a Plague Heart until it fully “awakens” and begins sending out Infesting Hordes. For example, attacking zombies in the area will have a minor effect, while a Screamer’s cry will have a major effect and likely alert the nearby Plague Heart. Certain Curveballs will also have the potential to awaken Plague Hearts.
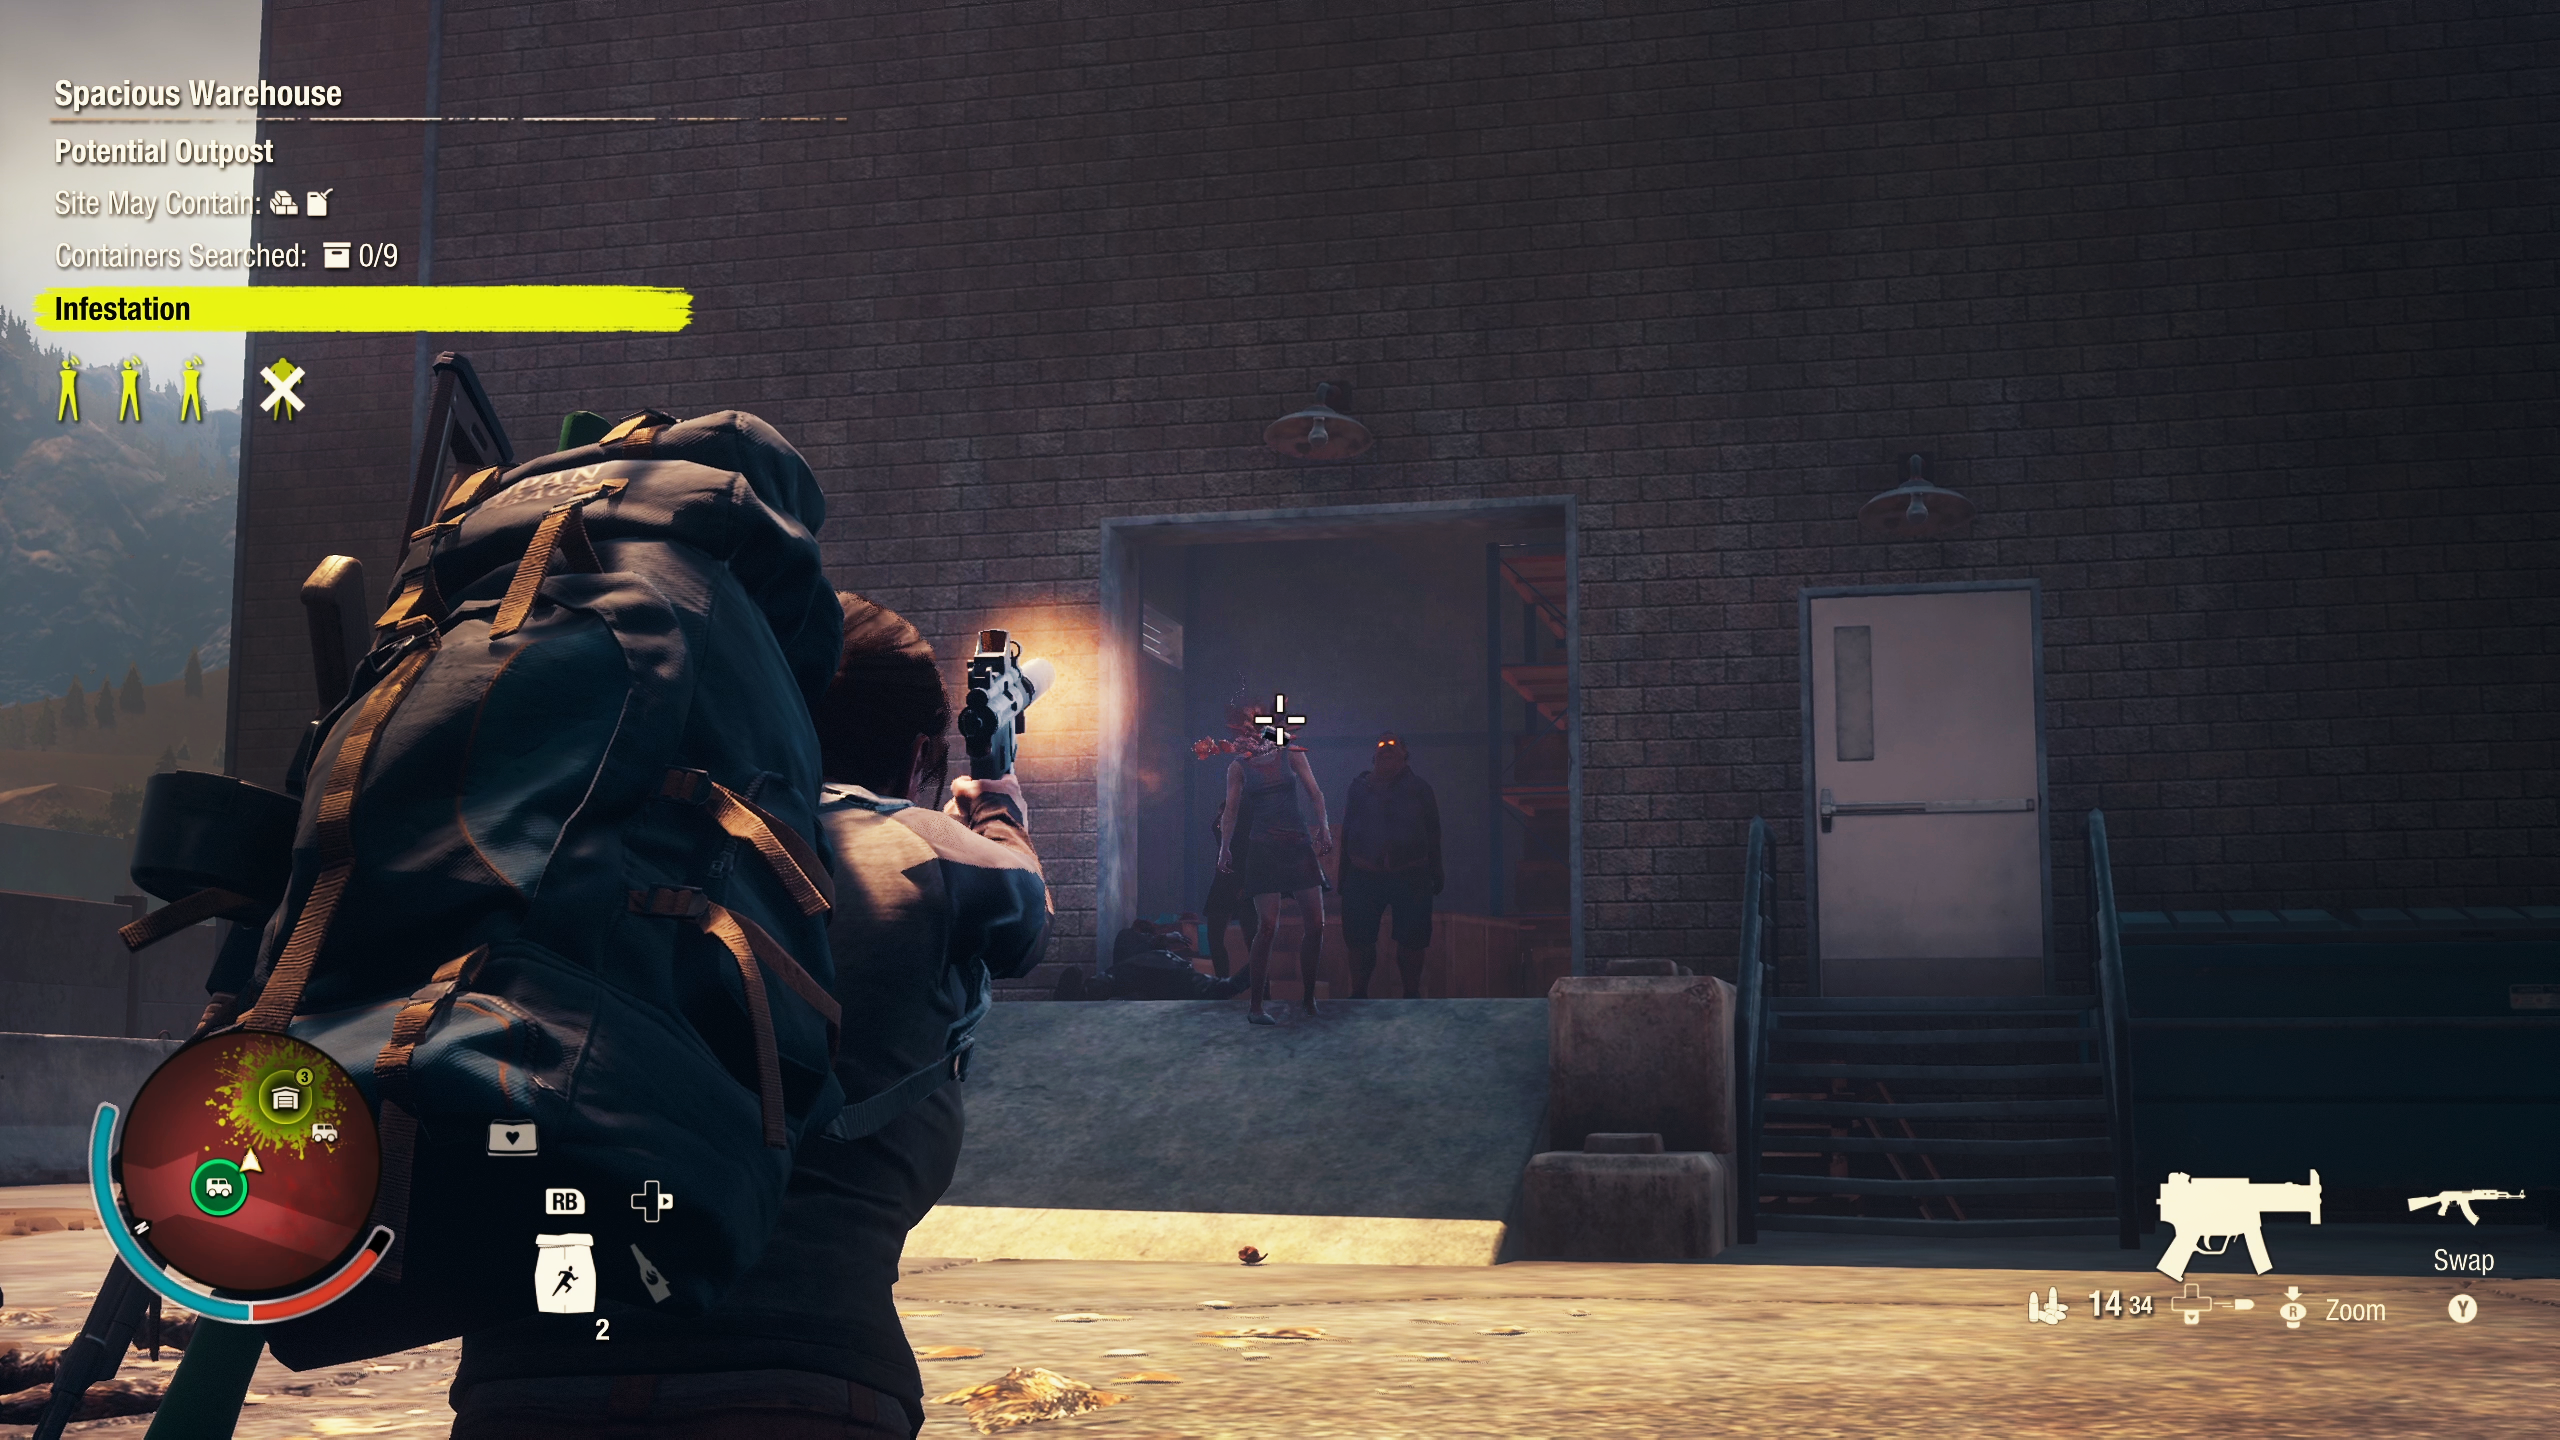
When Infestations finally arrive within striking distance of your Home Base, they form Siege Sites, which will grow until they are ready to launch a coordinated assault on your base. These directed Infestations and Sieges are deadly and dynamic. Your only hope is to push back the Infestations and keep Sieges under control until you’re ready to take out the source of it all: the Plague Hearts.
Noise Level determines the growth rate at which infestations grow. Your community always has a passive amount of noise based on the number of community members. The more labor going on, the more noise as well. So be careful of making too much noise when plague hearts are awakened because they’ll seek out your community even faster.
Siege Threat is the indicator to show you how deadly an upcoming siege could be. The more Siege Sites, and the more zombies that are at the Siege Sites (their Severity), the higher the Threat.
For more information see Update 33’s patch notes.
Note: Awakened Plague Hearts never become dormant again and must be destroyed.

You are not in this alone! Here is some help:
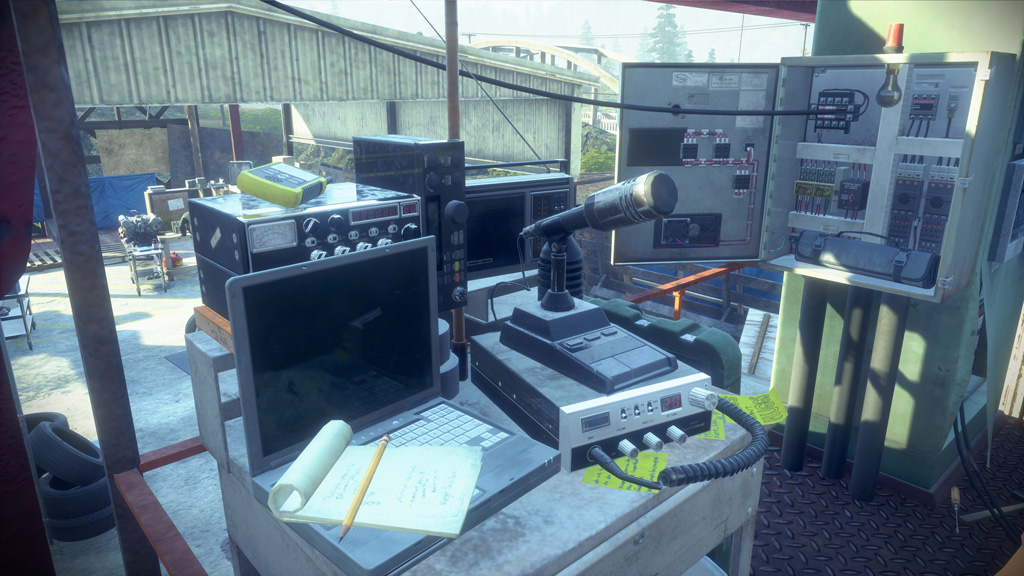
Radio Commands
You can use the Radio to send Survivors from your Community to help deal with Infestations while you attend to other matters.

Scout All Infestations
The “Scout All Infestations” call will consume fuel in exchange for a Survivor driving around locating new Infestations you might not be aware of.
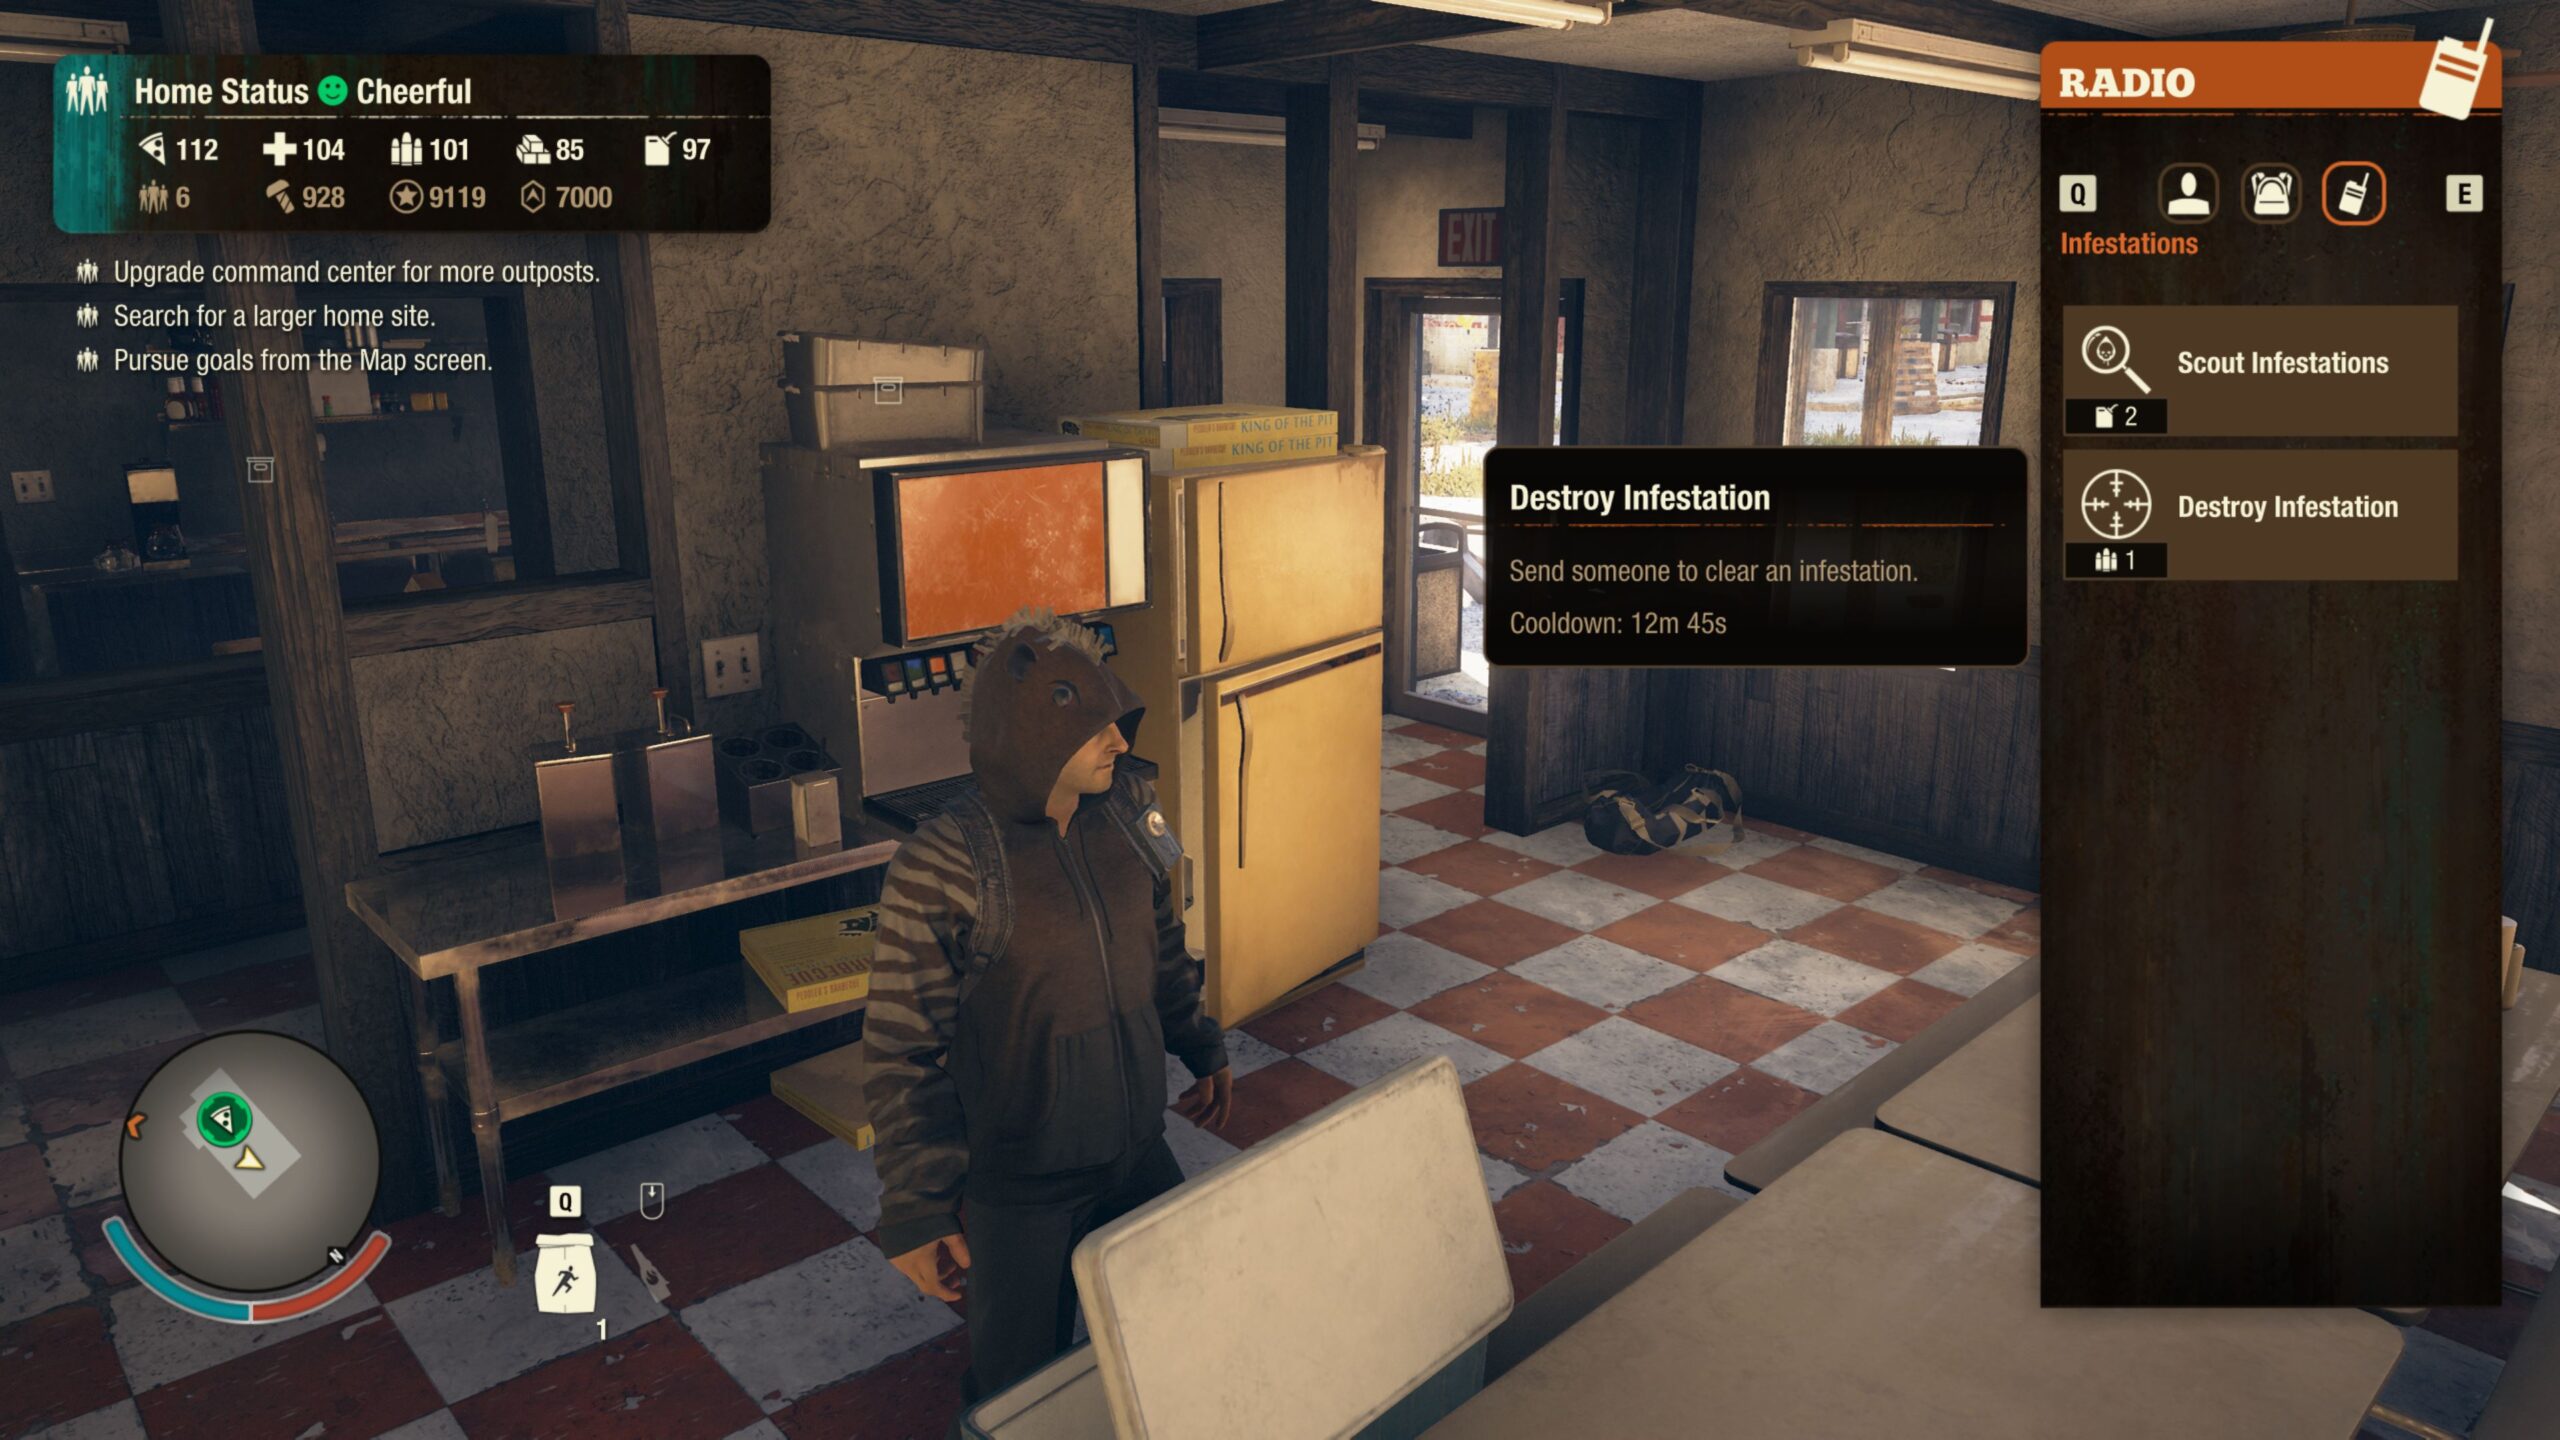
Destroy Infestations
The “Destroy Infestations” call will help mitigate some of the growth by automatically pruning an Infestation on the map for you, at the cost of ammo.
Outpost Defenses
Your Outposts can also be leveraged to fight back against the Infestations by enabling Outpost Defenses. These outpost defenses have cost and durations, but when used correctly can provide unique strategies for containing Infestation growth.
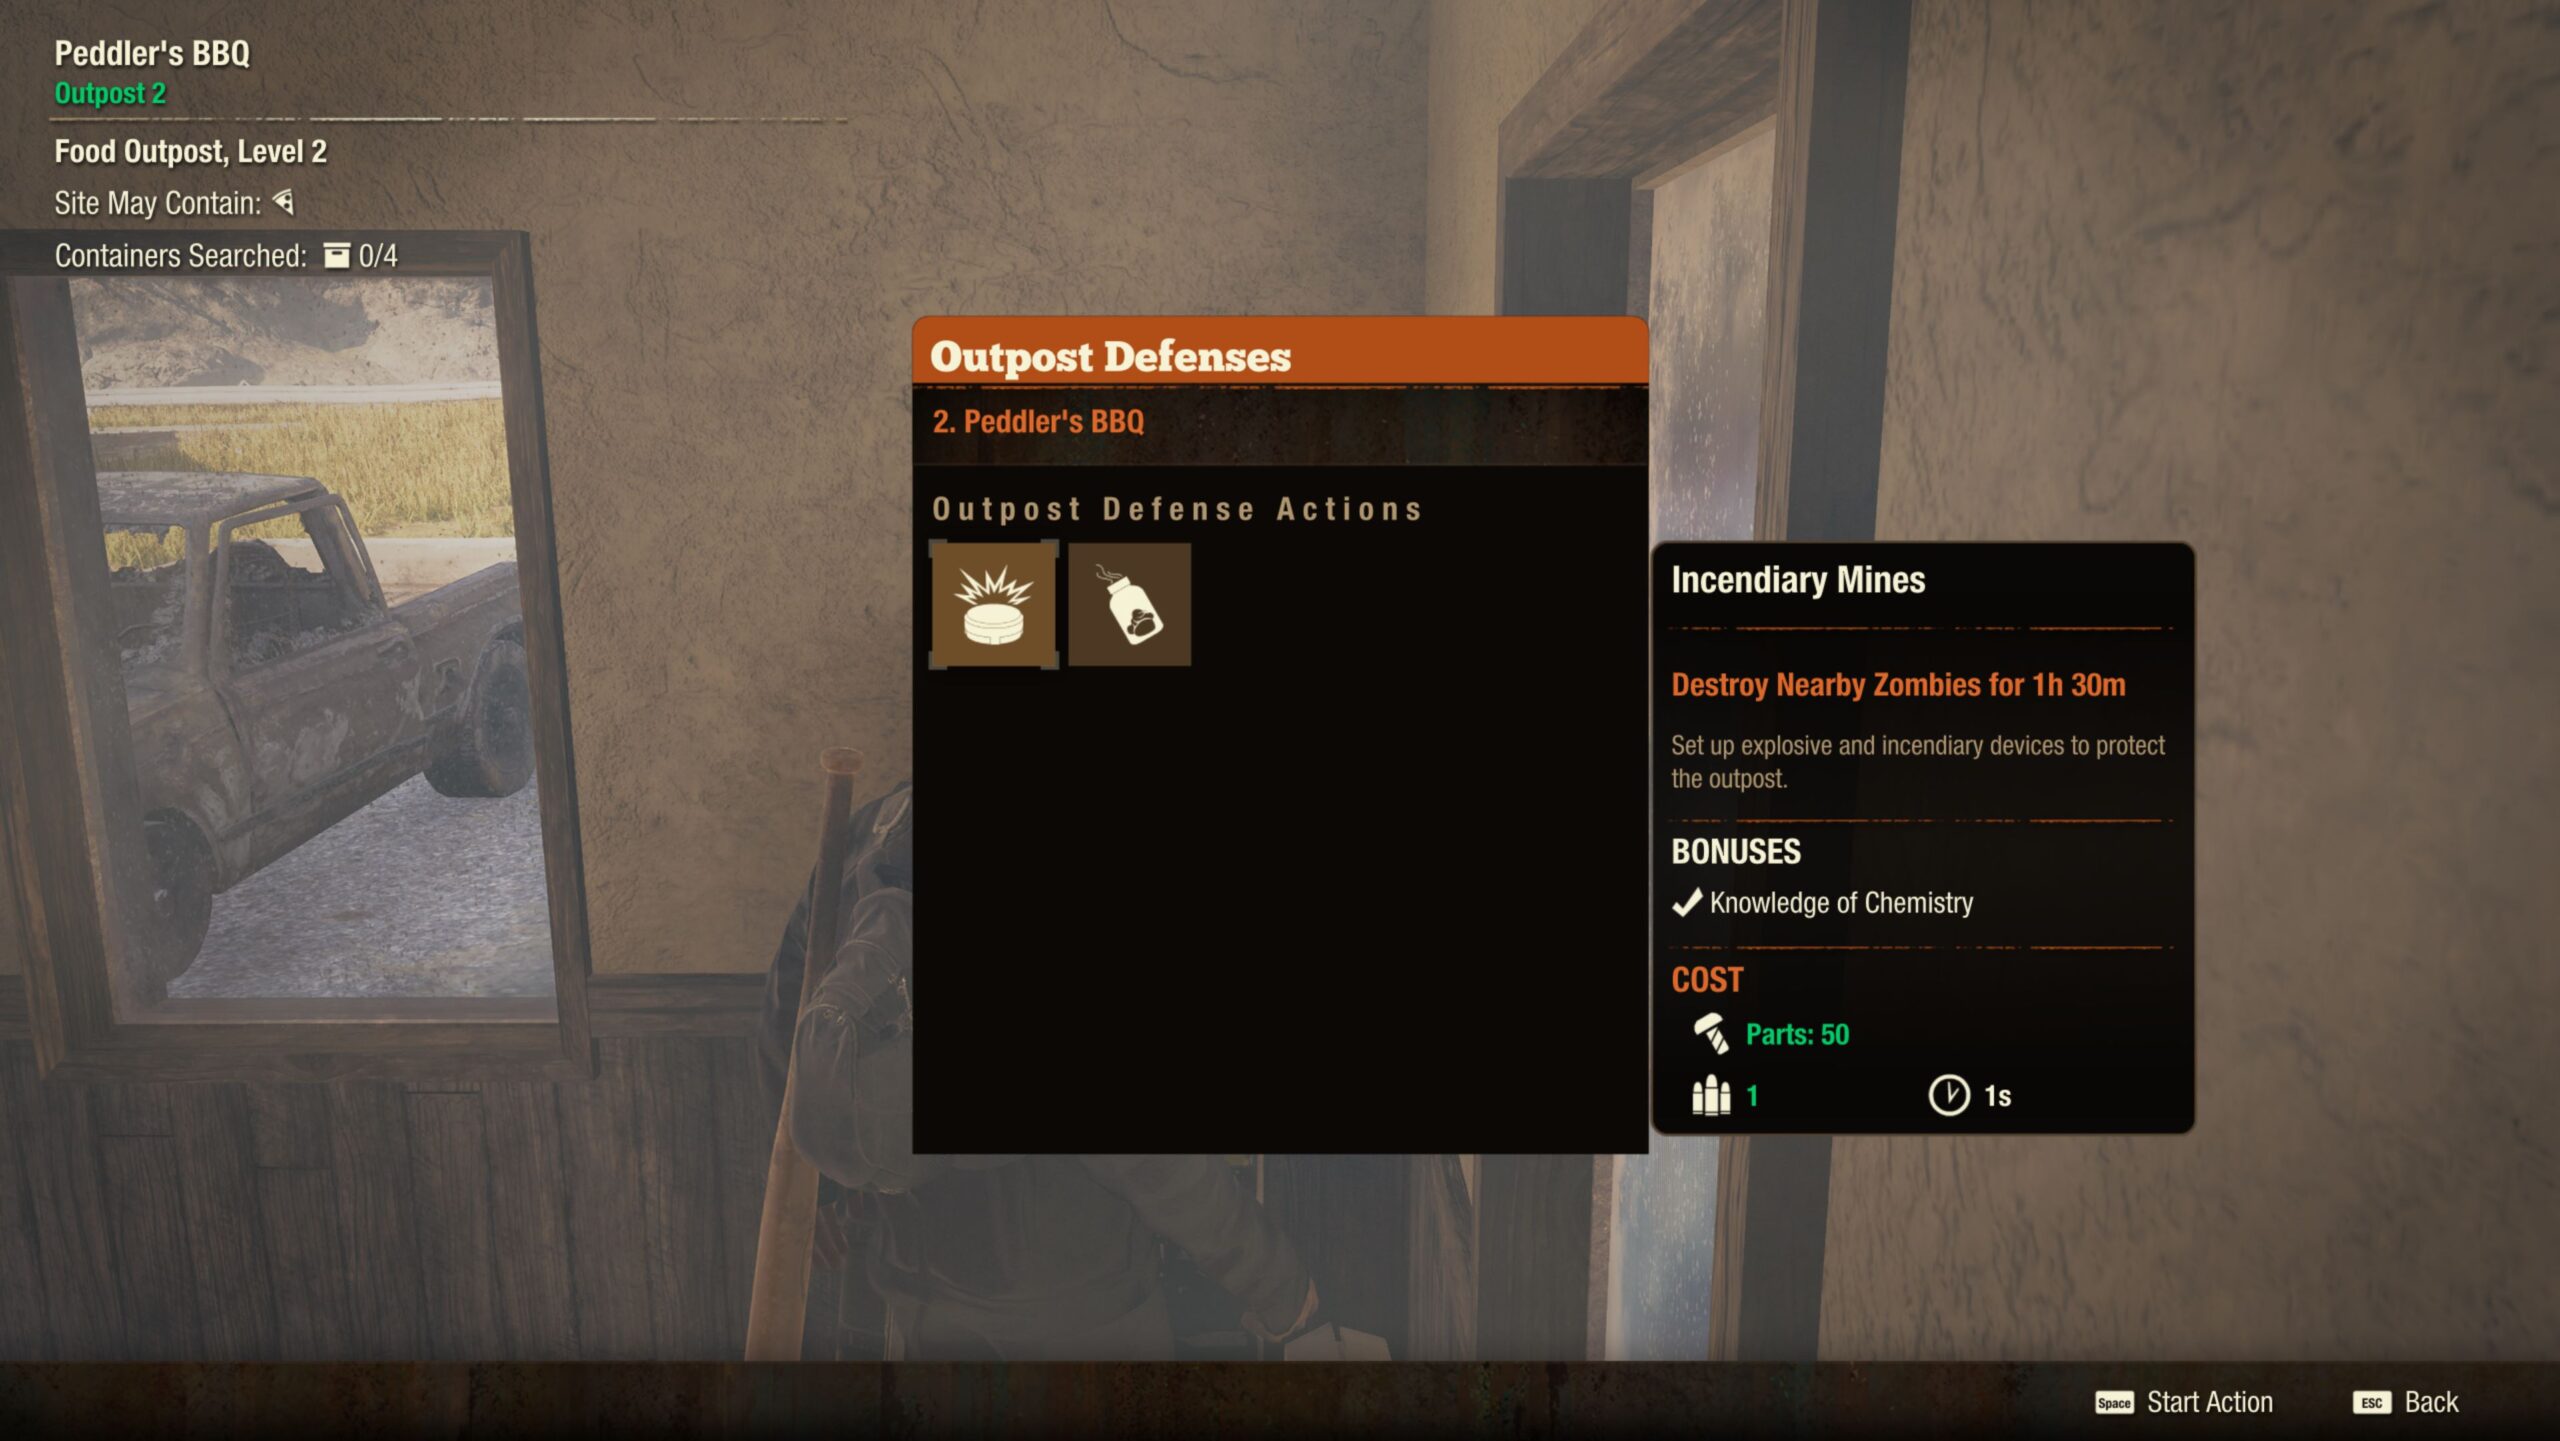
Incendiary Landmines
Incendiary Landmines, when enabled on Outposts along with frequently traveled Horde routes, will automatically blow them up, along with any ambient zombies as they enter the safezone, preventing infestation growth.
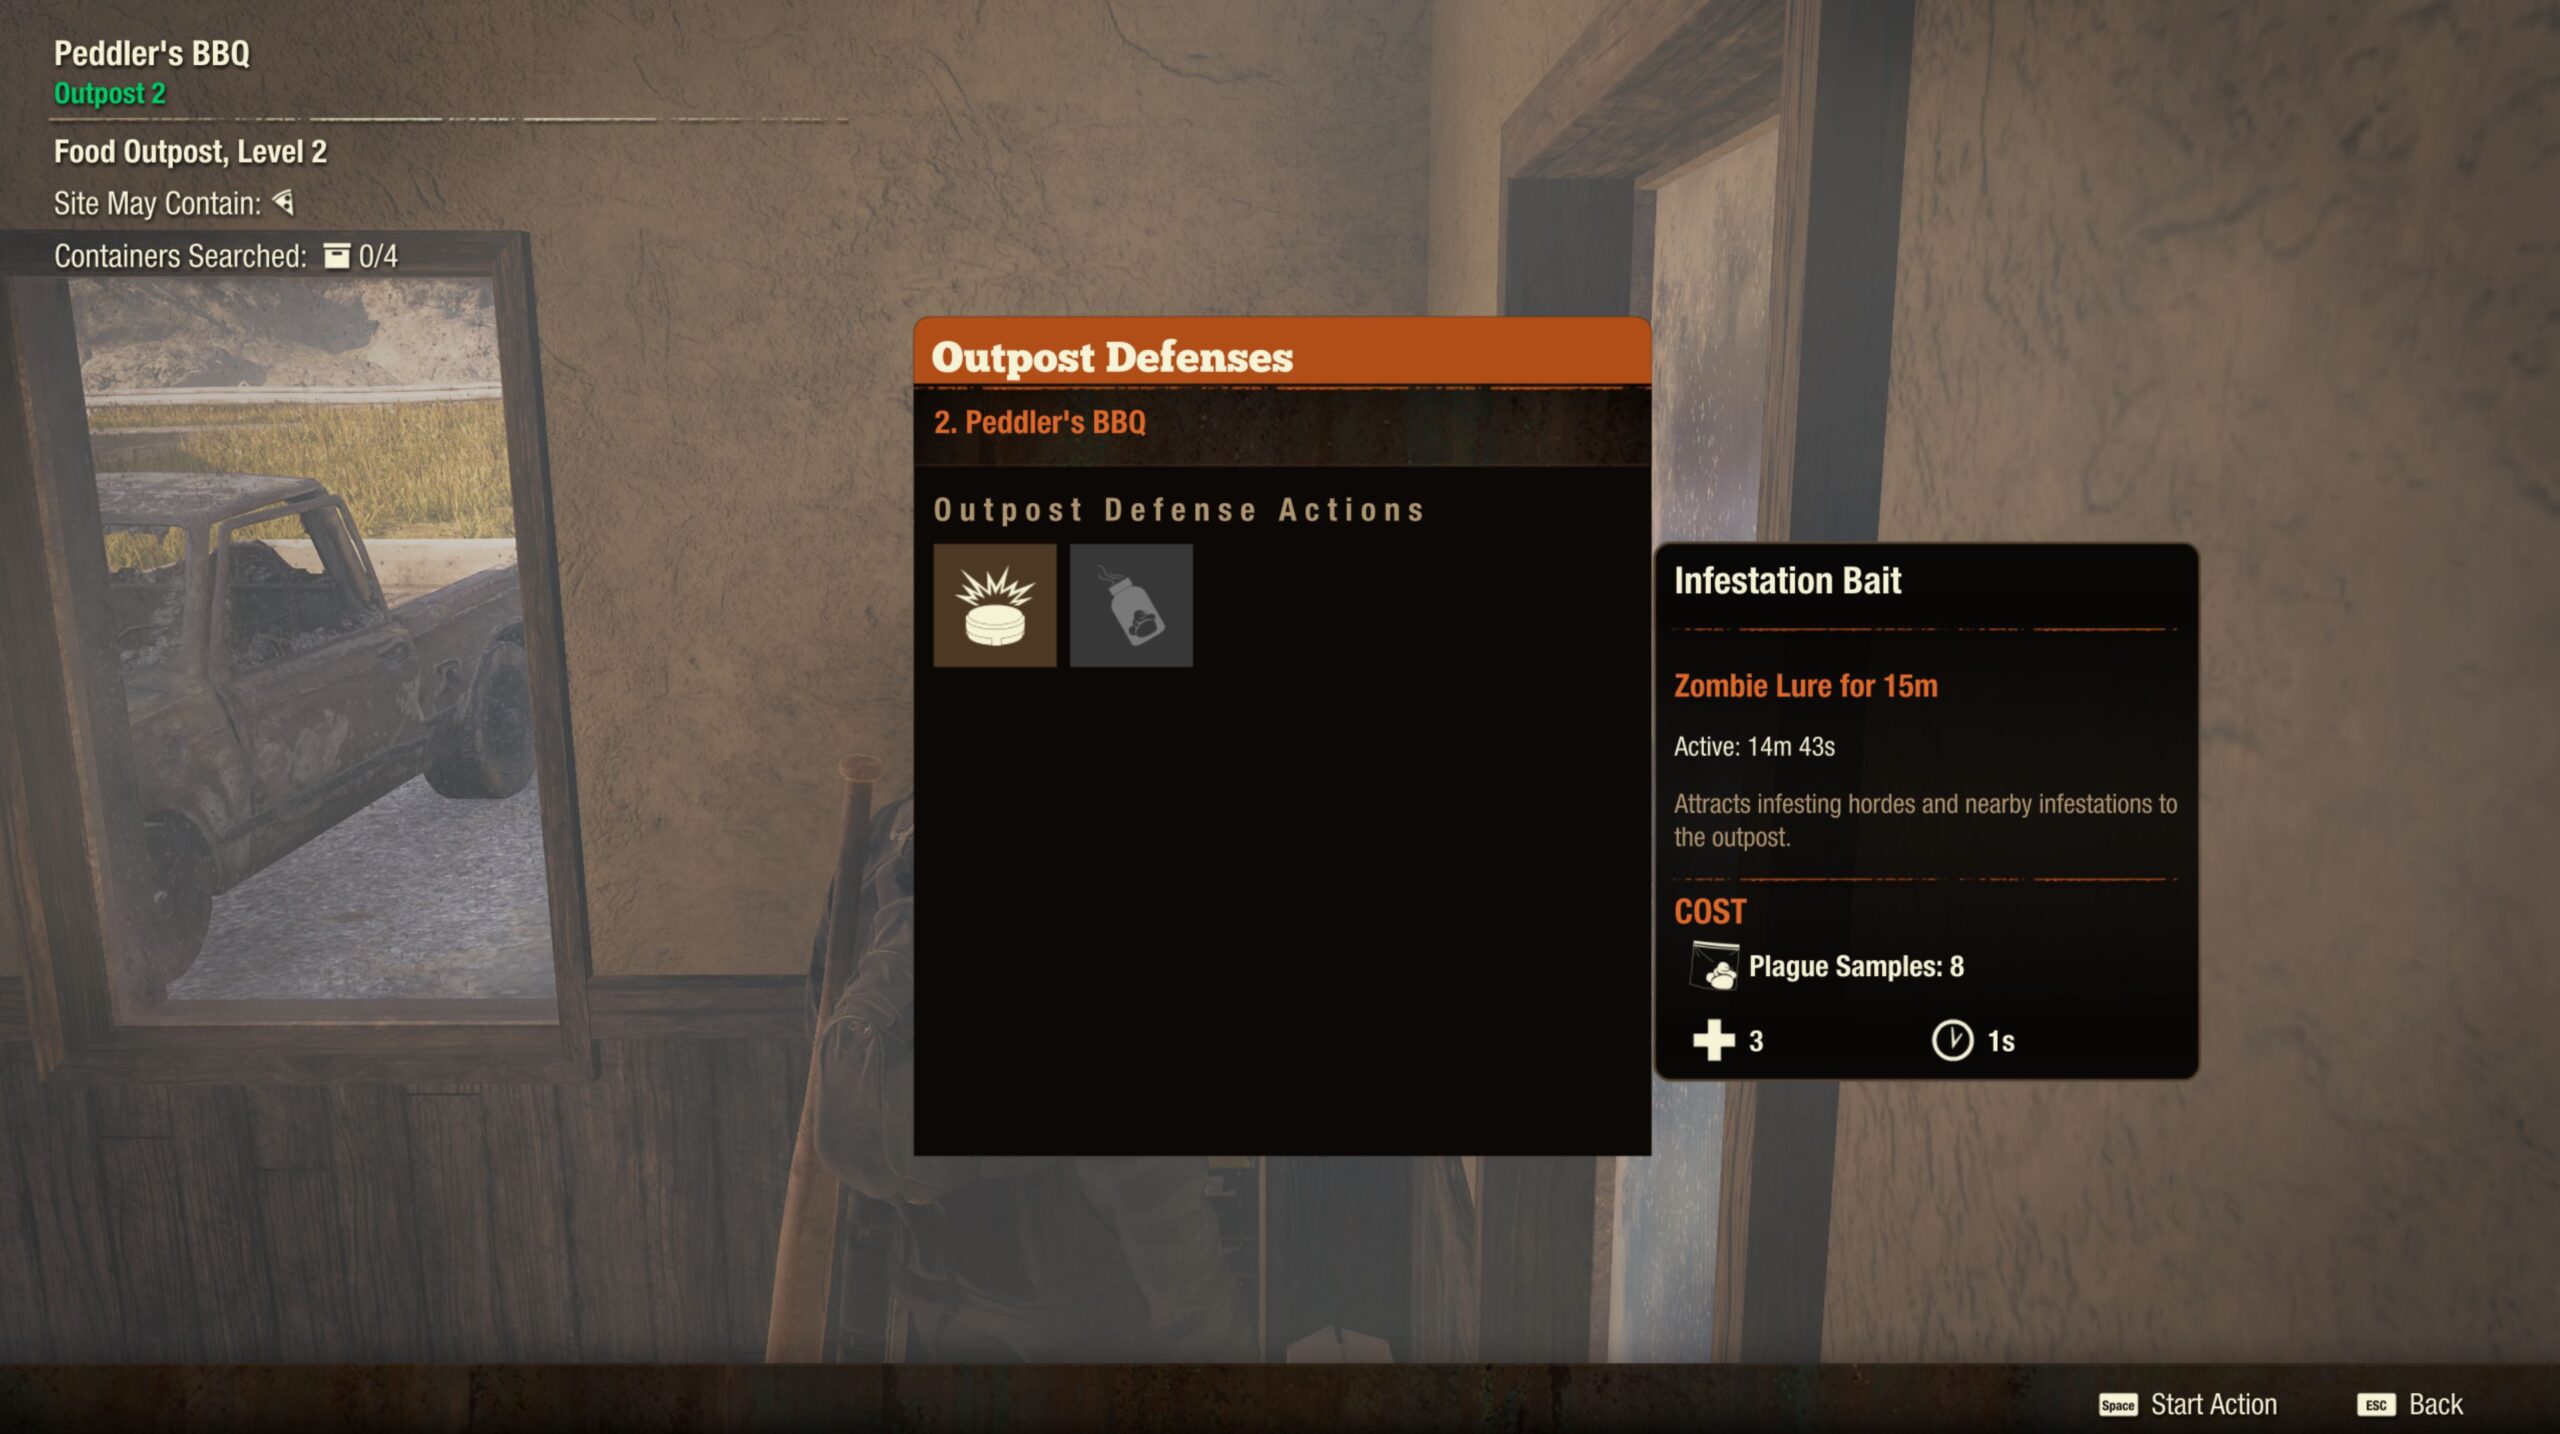
Infestation Bait
When enabled on Outposts, attracts and reroutes any infesting hordes that enter the scouting range of the outpost where it is activated. It will also slowly deinfest existing infestations in range by forcing them to send out hordes targeting the outpost until either the outpost is infested, the infestations in range are destroyed, or the time limit is elapsed.
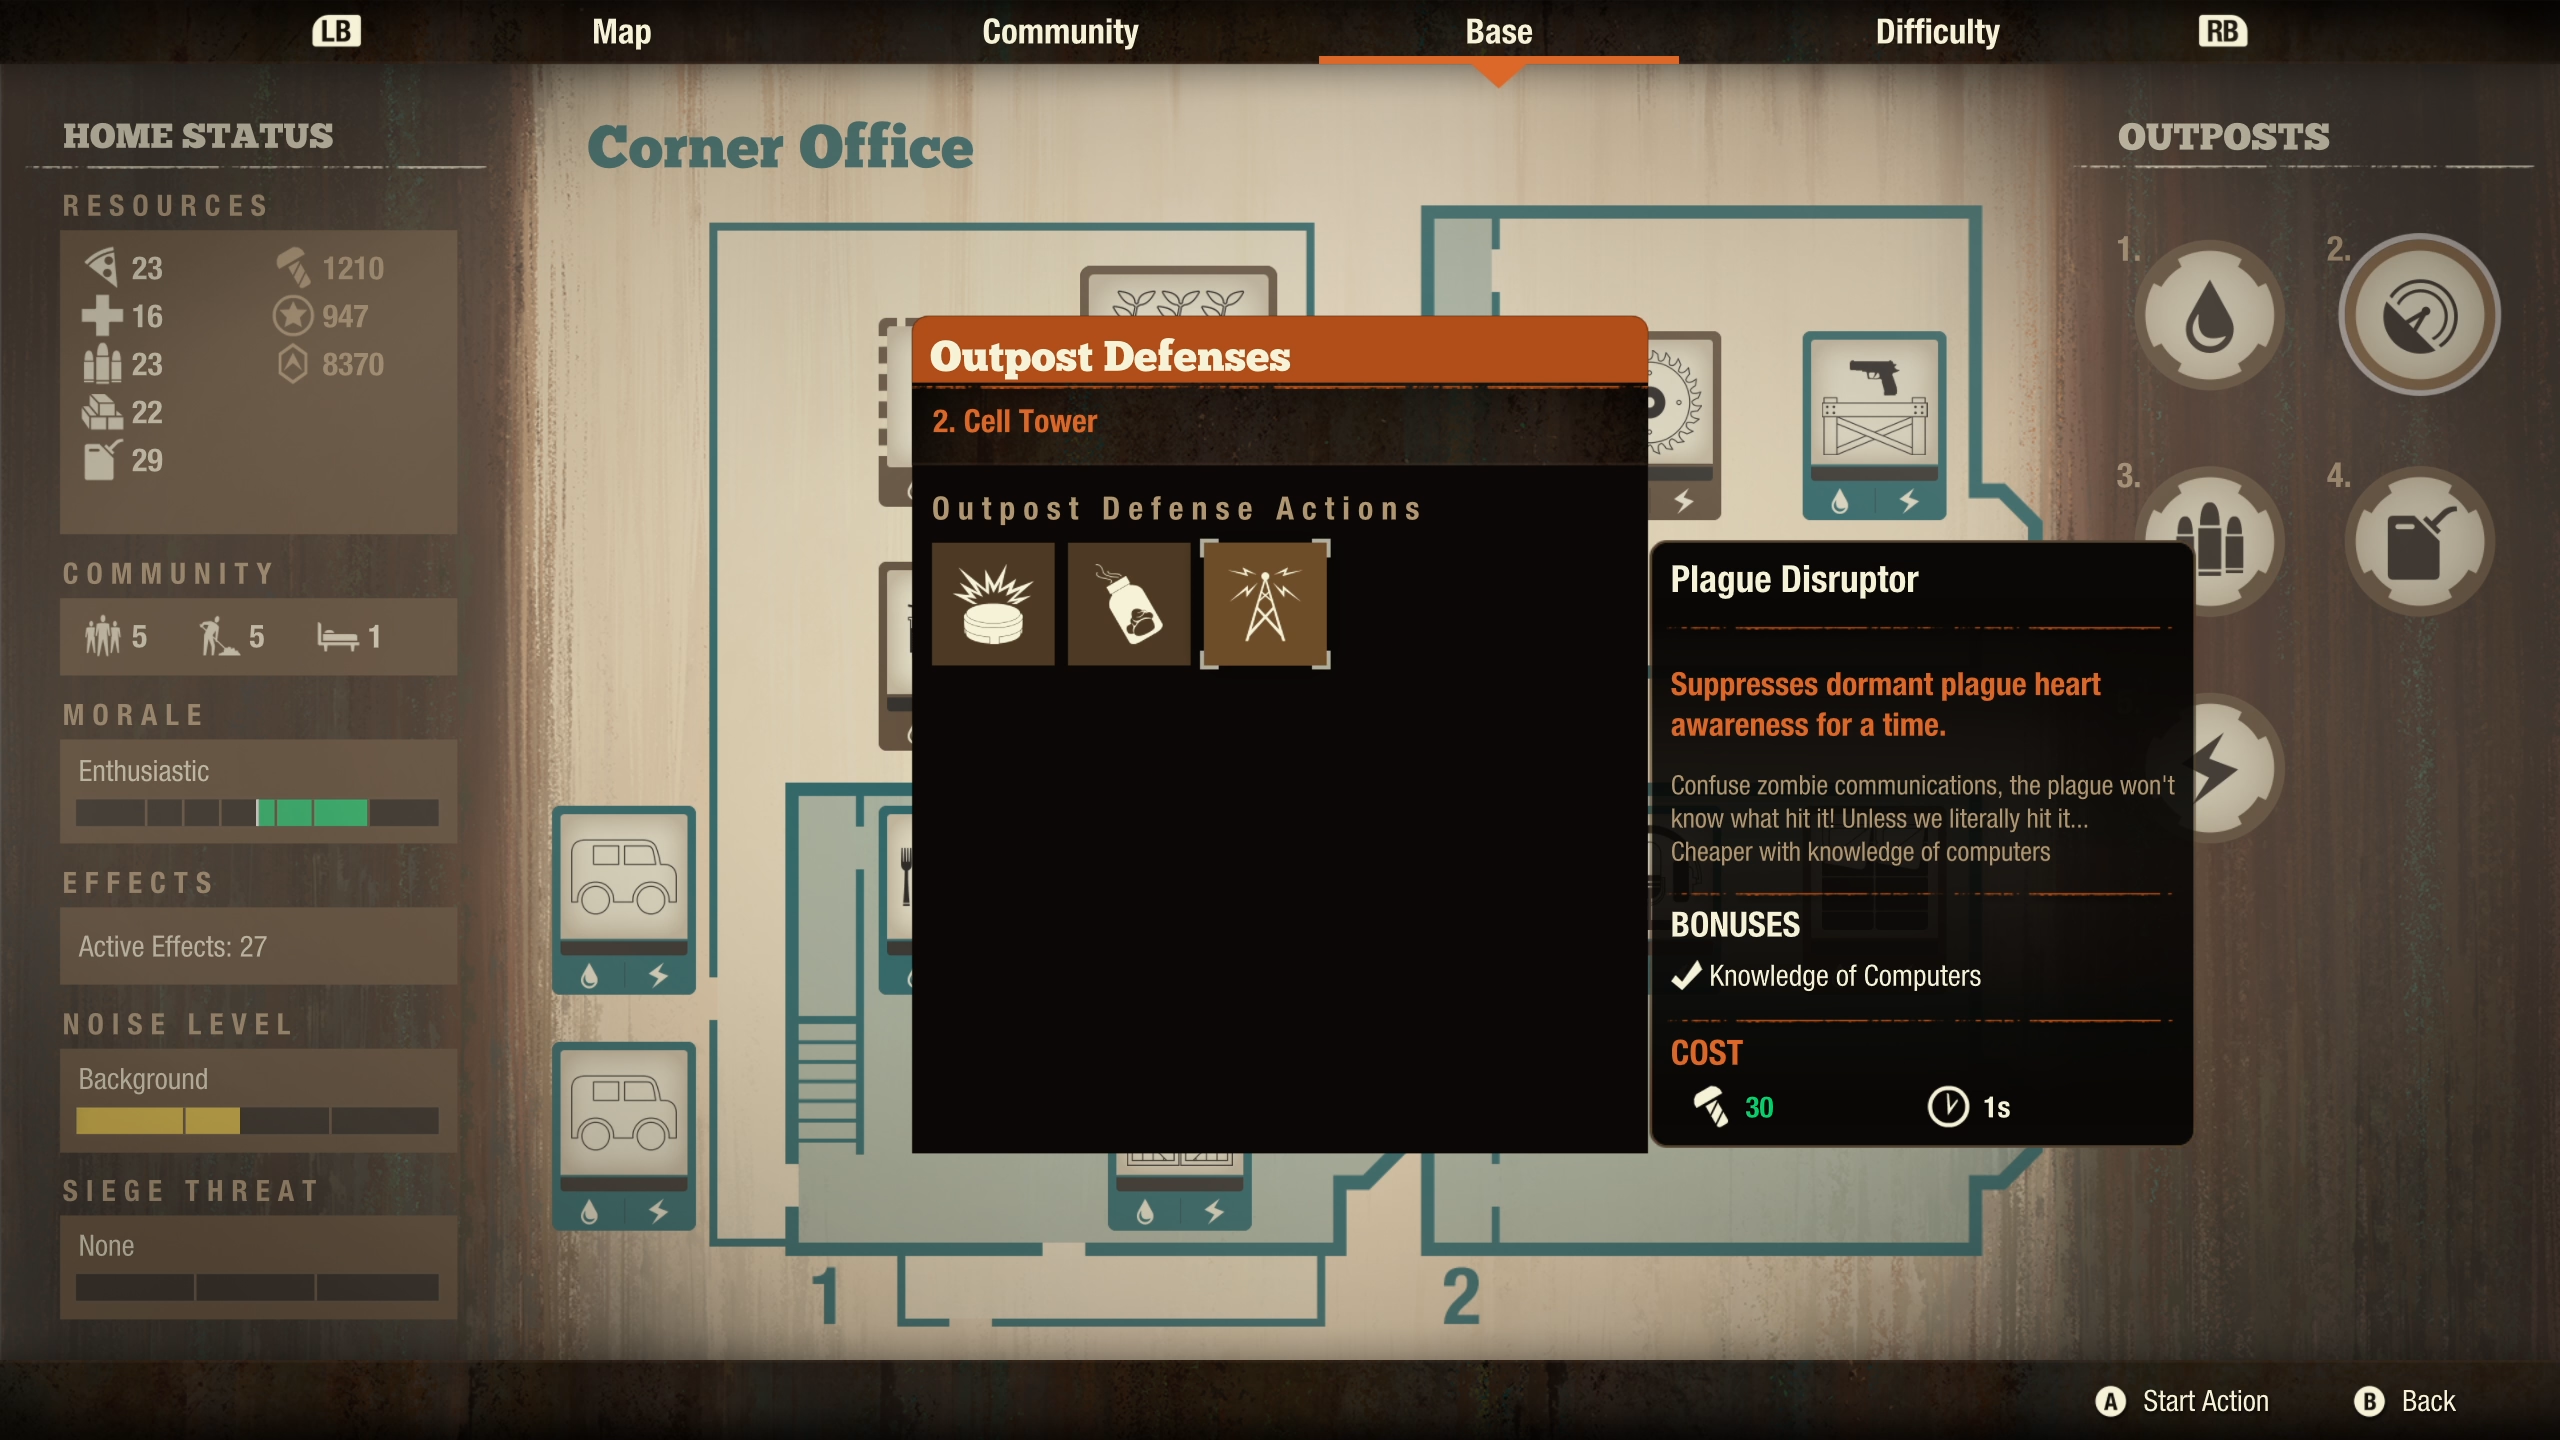
Plague Disruptor
When enabled on Cell Tower Outposts, will greatly reduce the plague heart’s sensitivity to actions that contribute to waking it up.

Scouting Range
Hovering over your home base or outposts to see their scouting range. The player will be notified when Infesting hordes, ambient hordes, and freaks that path through these scouting ranges and their icons will be added to the map.
For more information on how these sieges and hordes work, see Update 33: Heart Attack patch notes.